高解像・画質を上げて綺麗に画像生成したい!
Ultimate SD Upscaleの使い方を教えて!
拡張機能である「Ultimate SD Upscale」では、img2imgの「Script」項目から使用することが出来ます。
Ultimate SD Upscaleを使用すると、高解像になって綺麗に画像生成することが出来るのでクオリティが上がります。
この記事では「Ultimate SD Upscale」の使い方について解説します。
Ultimate SD Upscaleの導入方法

「Ultimate SD Upscale」の拡張機能を導入していきます。
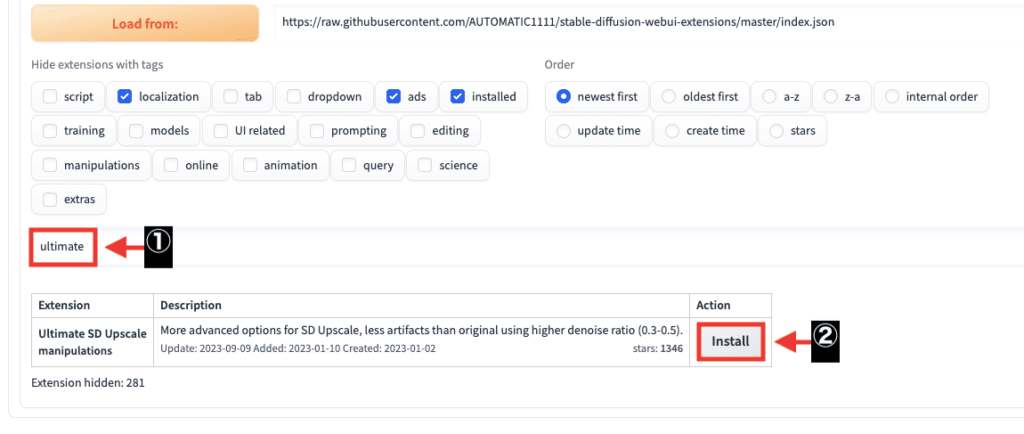
「Extensions」をクリックしてから「Available」を選択して「Load from:」ボタンを押してください。
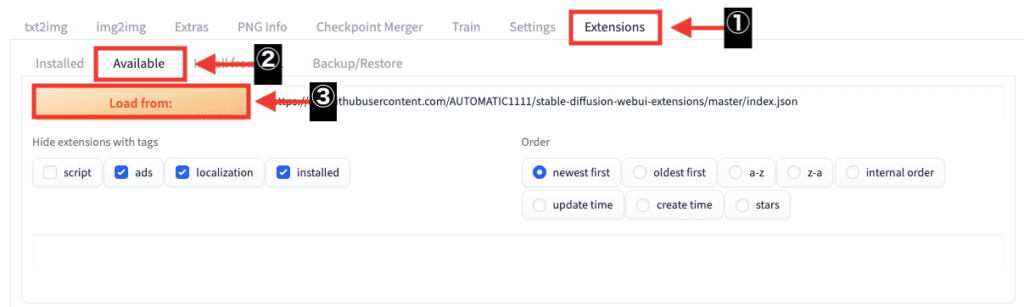
検索内で「ultimate」とゆっくり入力するようにしてください。
「Ultimate SD Upscale manipulations」が表示されるので、右側にある「Install」ボタンを押してインストールしてください。
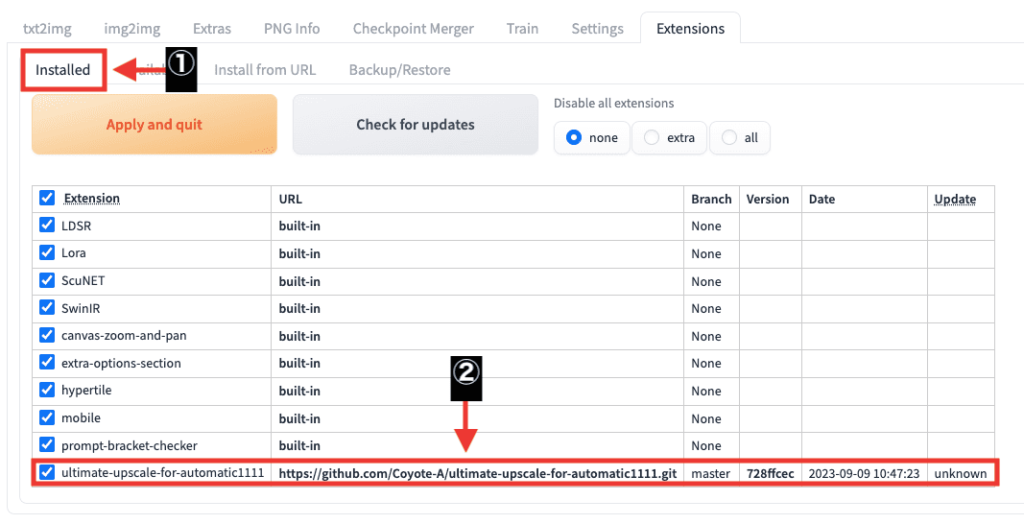
「Installed」をクリックしてから「ultimate-upscale-for-automatic1111」がインストールされているか確認してください。
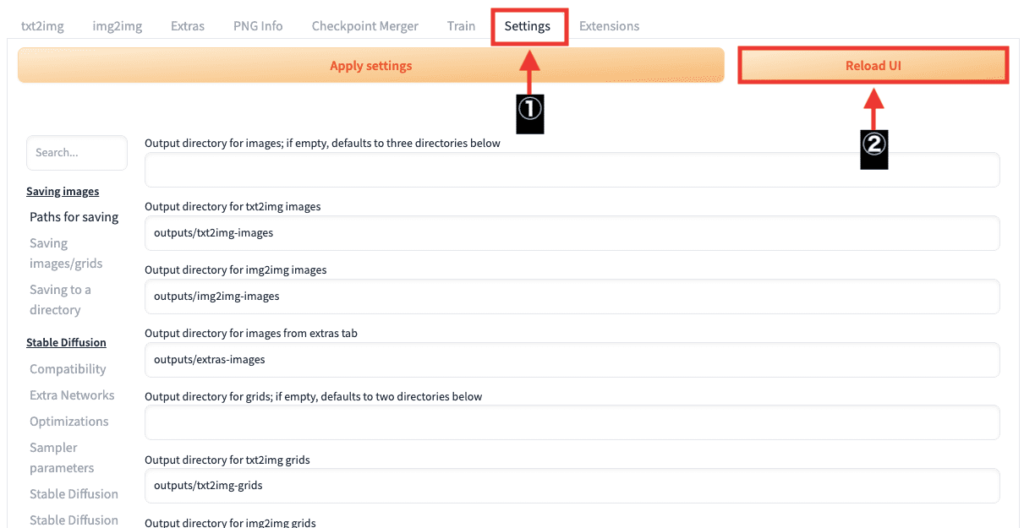
「Settings」をクリックしてから「Reload UI」ボタンを押してStable Diffusion Web UIを再起動することで導入完了です。
Ultimate SD Upscaleの使い方

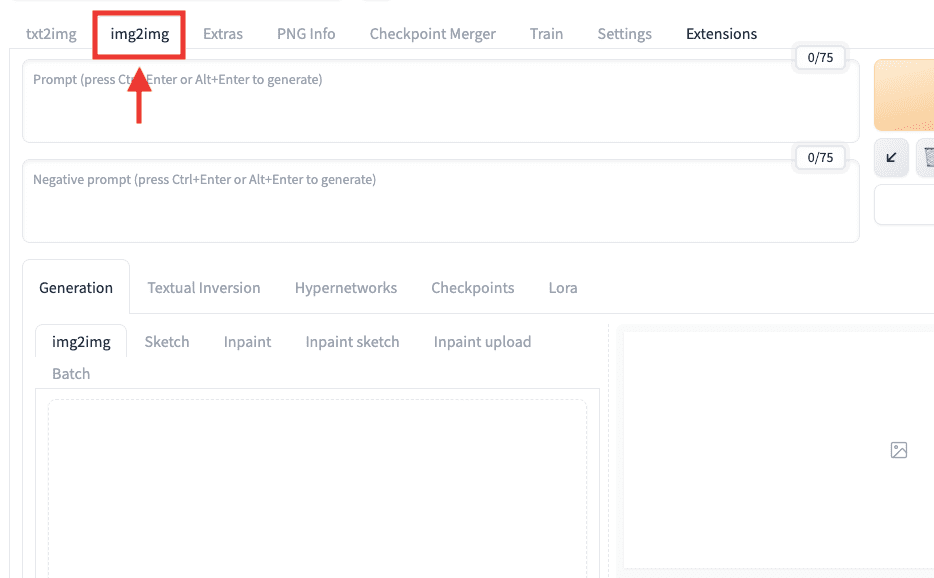
「Ultimate SD Upscale」は「img2img」の項目から使用することが出来るのでクリックしてください。
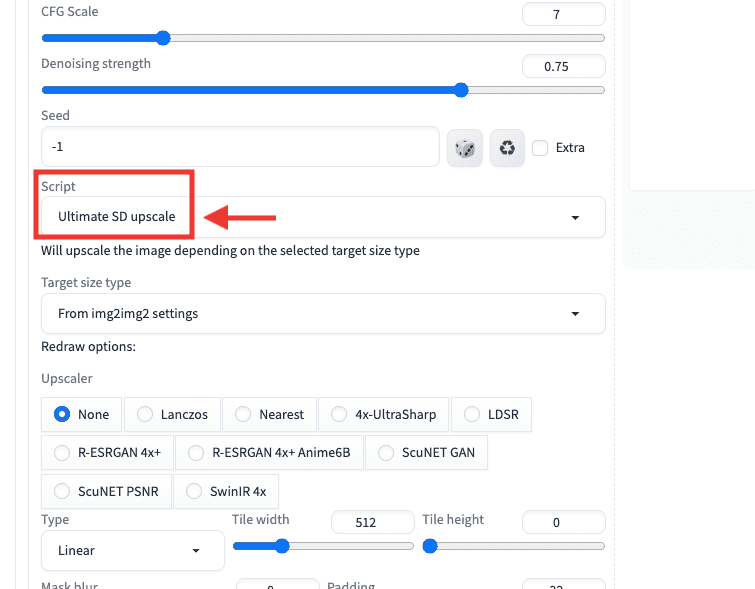
下部にある「Script」項目をクリックして「Ultimate SD upscale」を選択することで使用できます。
img2img内に一度生成した画像をアップロードして、アップロードした画像作品の内容と同じプロンプトとネガティブプロンプトなどで設定してから画像生成してください。
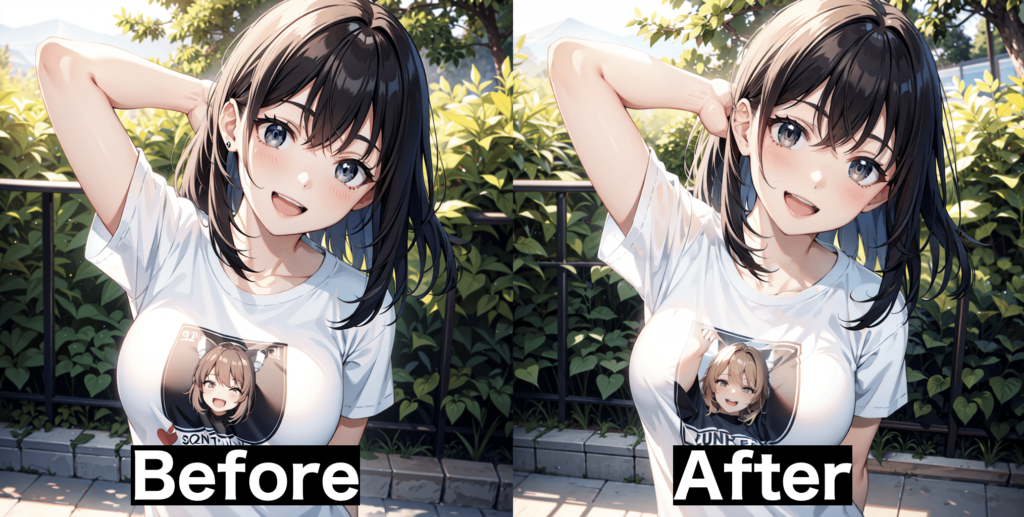
以下の画像は「Ultimate SD Upscale」の無しと有りを比較した結果になります。
「Before」よりも使用した右側の「After」方がより綺麗に画像生成することが出来ています。
以下は動画にして比較した結果になります。
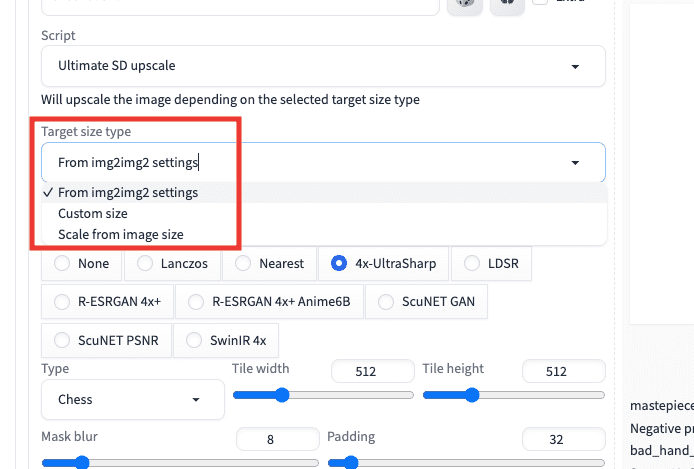
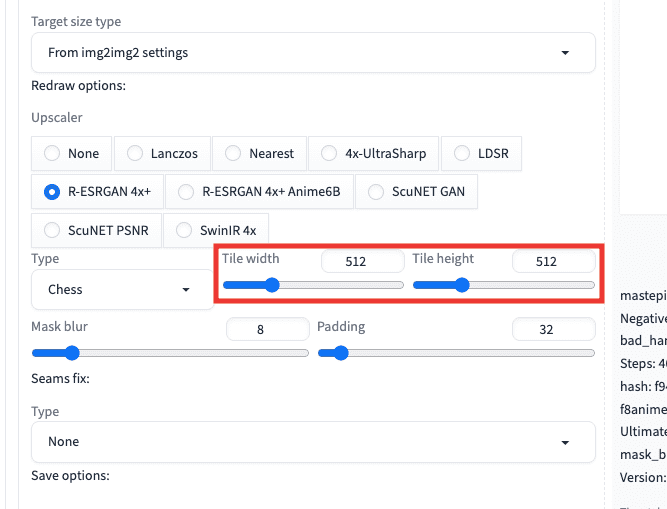
「Target size type」項目では、画像生成するサイズを設定することが出来ます。
| From img2img settings | img2imgにある「width」と「height」で設定したサイズ |
| Custom size | 「width」と「height」項目の表示が追加されるので、細かく数値設定することが出来ます |
| Scale from image size | 「scale」項目の表示が追加されるので、サイズをScale数値で設定することが出来ます。 |
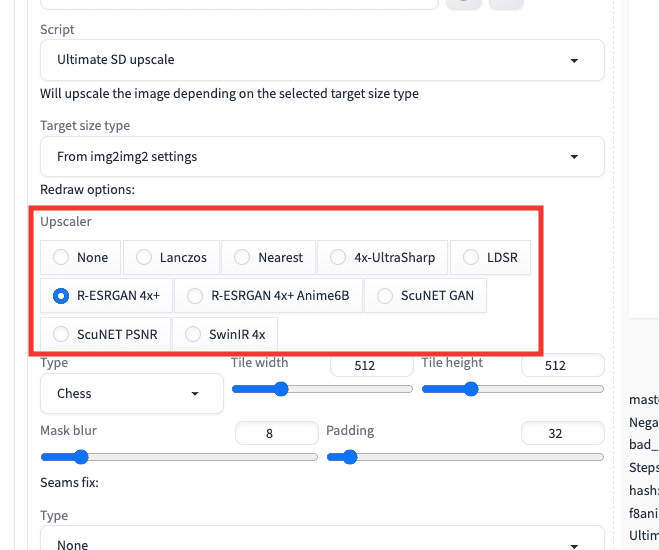
「Upscaler」項目では高解像にさせる方法を設定することが出来ます。
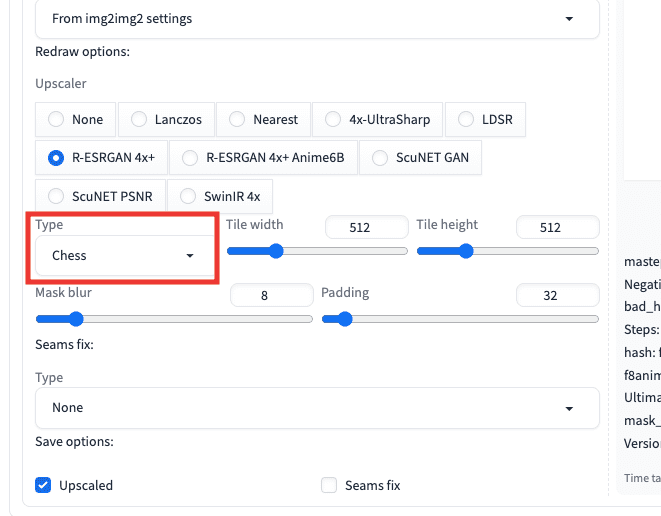
「Type」項目では「Liner」か「Chess」があり、画像生成の結果が少し変わります。
以下の動画では、「Liner」と「Chess」を比較した結果になります。
顔の部分は変わっていないのですが、服装や背景が少し変わっています。
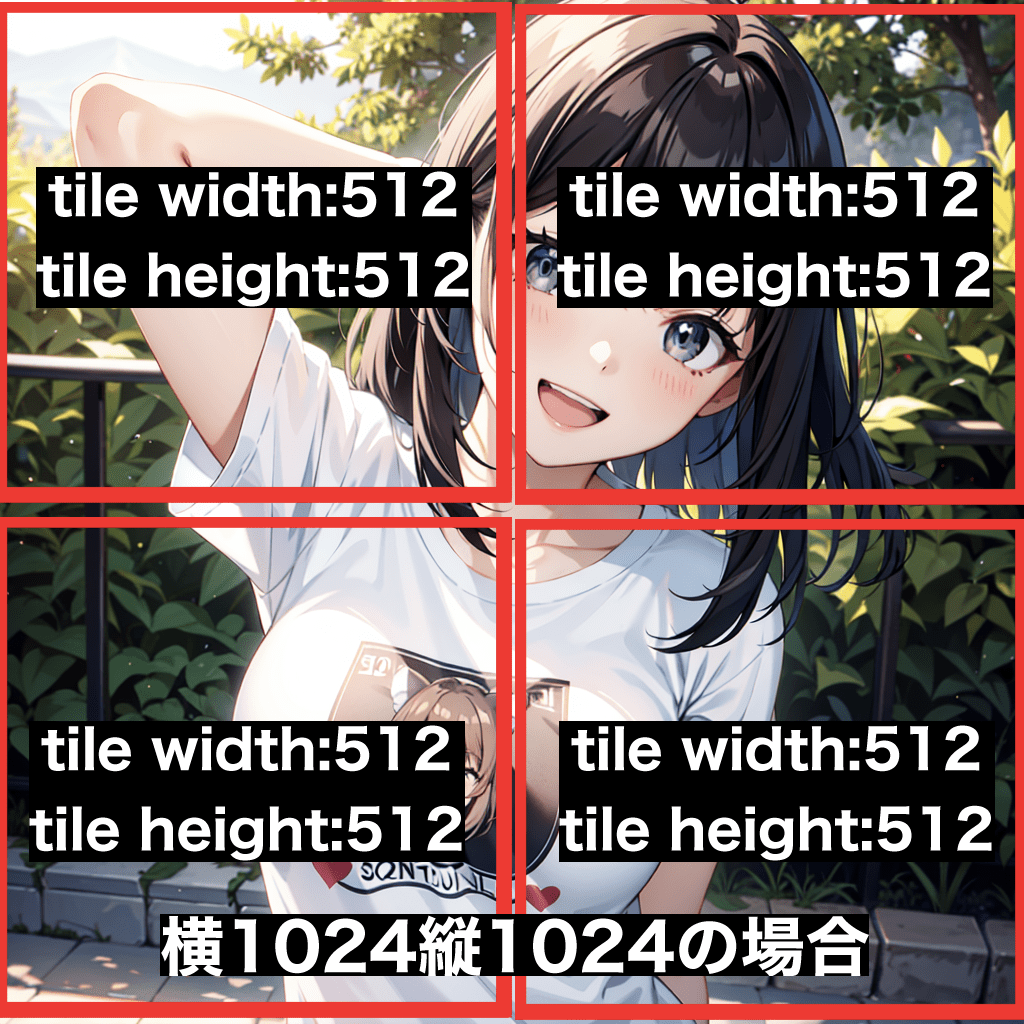
「Tile width」と「Tile height」では、処理させる画像サイズの設定になります。
例えば以下の画像のように、元画像が「横1024縦1024」で「Tile width:512,Tile height:512」に設定した場合は、「横1024縦1024」の画像を4分割にして高解像処理をしていきます。
分割で高解像処理させることによって画像生成が速くなります。
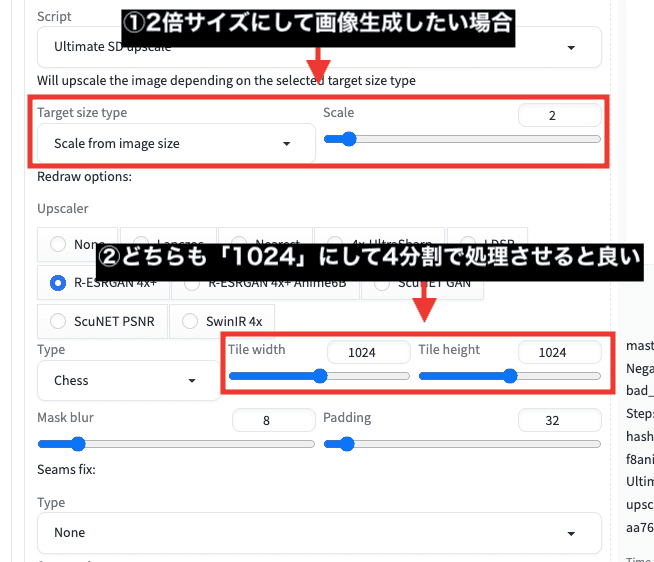
元画像が「横1024縦1024」で2倍サイズにして画像生成したい場合は、「Scale from image size」を選択して「Scale」を2に設定します。
「Tile width:1024,Tile height:1024」にして4分割に処理させて画像生成することで良い結果になりやすいです。
「Tile width:512,Tile height:512」にした場合は16分割になるのですが、クオリティが劣化しやすいので4分割に設定するようにしましょう。
「Mask blur」では、分割で処理した場所の境界線部分をぼかす設定になります。
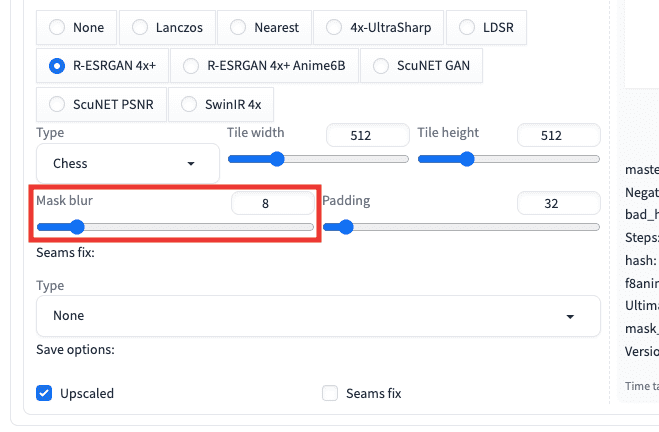
以下の画像では、「Mask blur」の数値を「0」と初期設定の「8」にした比較結果になります。
左側にある「0」の数値では、処理した境目部分に線が入っており髪の毛が途切れた感じになっています。
右側にある「8」では線がなく自然に仕上がっています。
これらの結果から初期設定の「8」以上で設定するといいでしょう。

「Padding」項目では、余白設定のようですが正直よく分かりません。
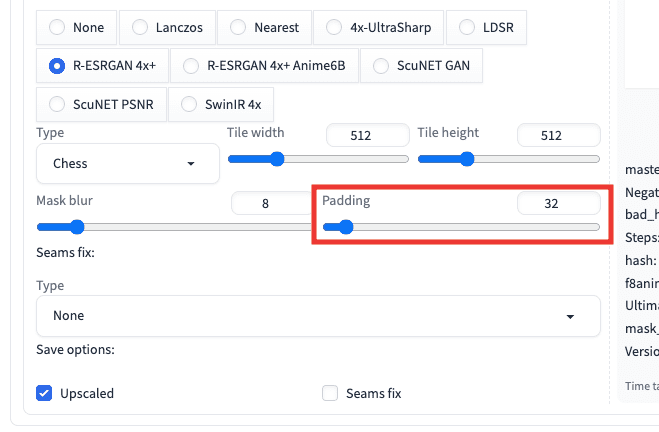
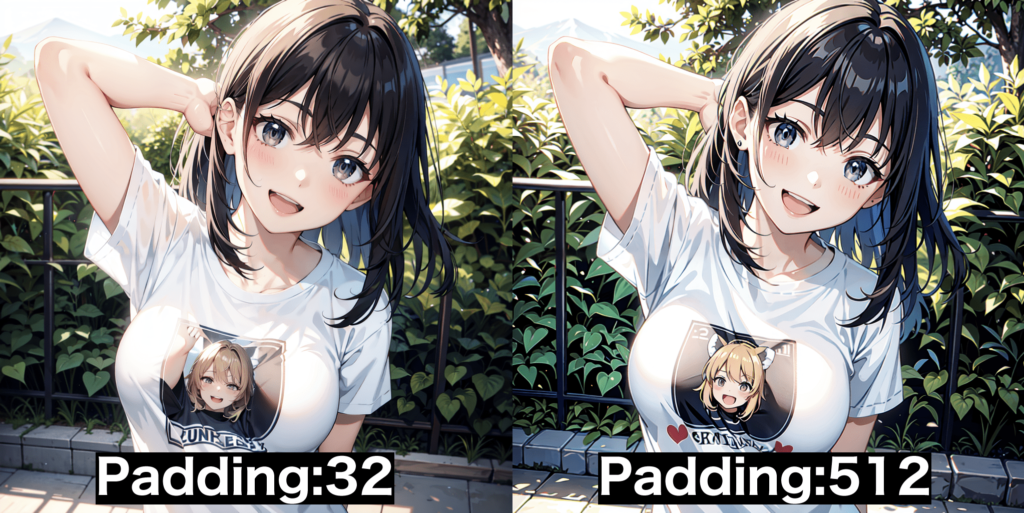
以下の画像では、「Padding」の数値を初期設定の「32」と最大の「512」で比較した結果になります。
全体が変わっているので、どちらも試してみて良い方を選択するといいと思います。
「Seams fix:」では、さらに細かく処理する境目部分の設定をすることが出来るので、微調整したい場合に使用すると良いです。
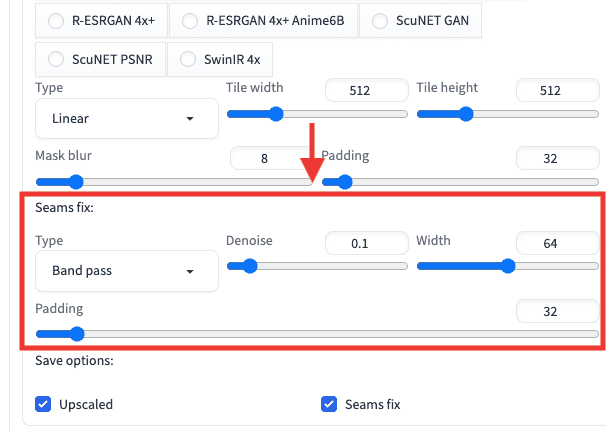
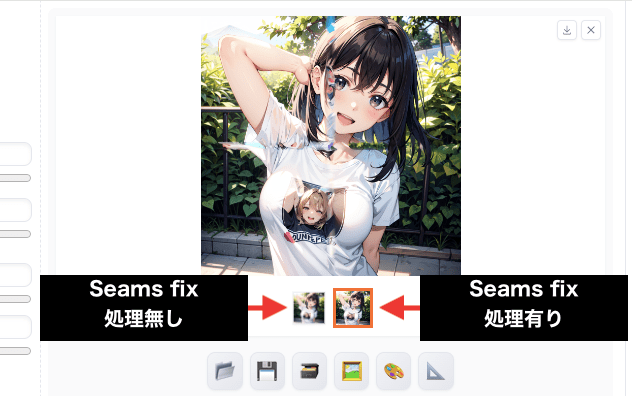
以下の画像のように「seams fix」を使用した場合は、処理無しと有りの2枚で画像生成します。
まとめ

「Ultimate SD Upscale」の使い方について解説しました。
使用することで、高解像になり綺麗に画像生成することが出来るのでおすすめの拡張機能です!
ぜひ参考にして画像生成してみてください。
他に綺麗に高画質・高解像にさせる方法として「4x-UltraSharp」があります。
「4x-UltraSharp」は「Ultimate SD Upscale」と一緒に使用することでクオリティが上がるので、是非利用してみてください。
「4x-UltraSharp」の使い方について以下の記事で解説しています。