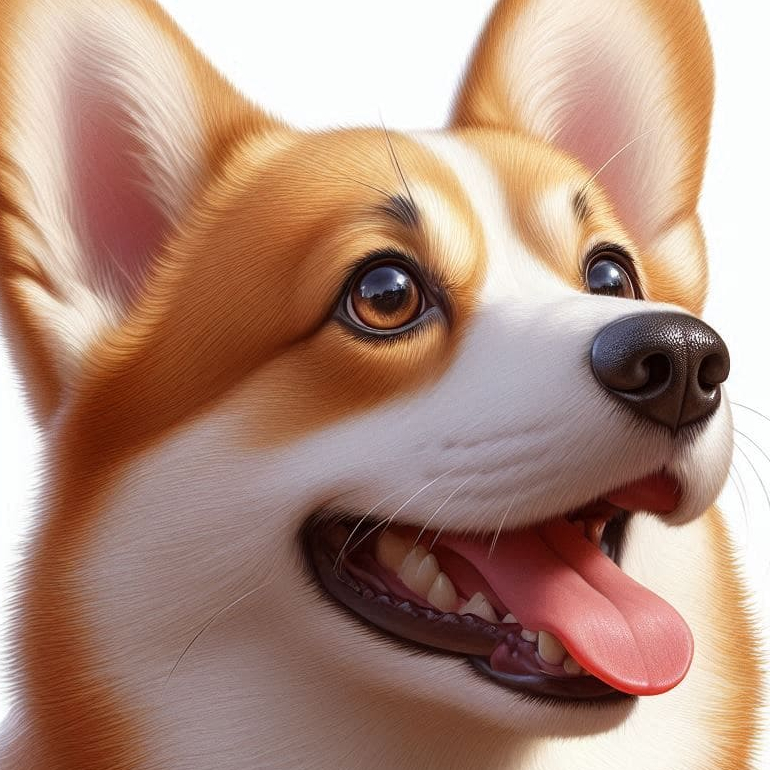
AI美女を生成したい!
ChilloutMixの使い方を教えて!
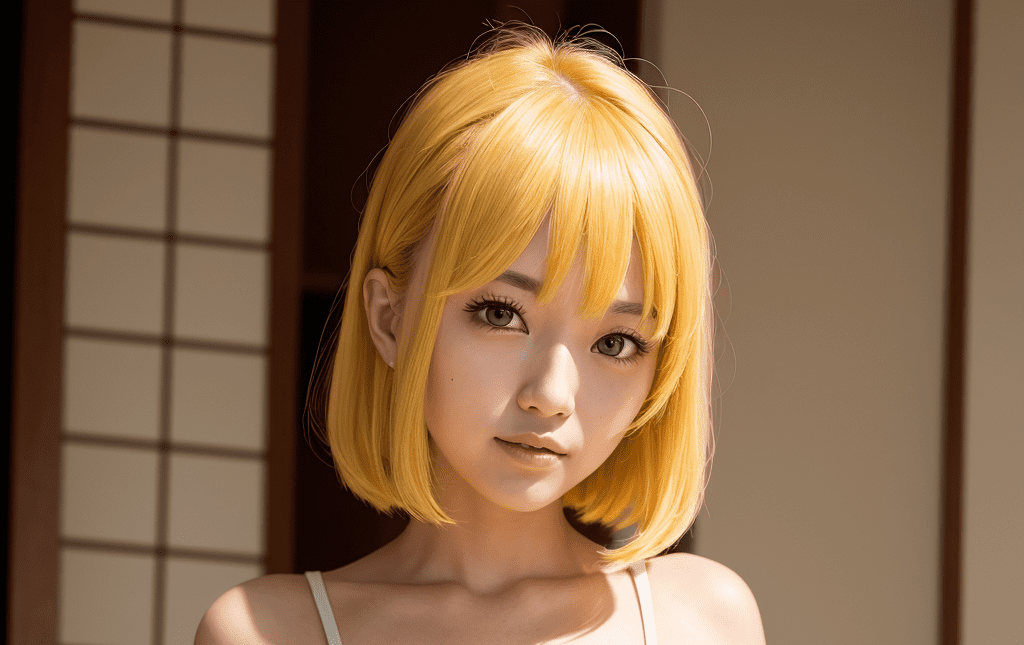
ChilloutMixはリアル風(実写)の画像生成をすることができます。
可愛いAI美女やAIグラビアを生成させることが出来るのでおすすめのモデルになっています。
この記事では、ChilloutMixの使い方について解説します。
Chillout MixからダウンロードURLをコピーする
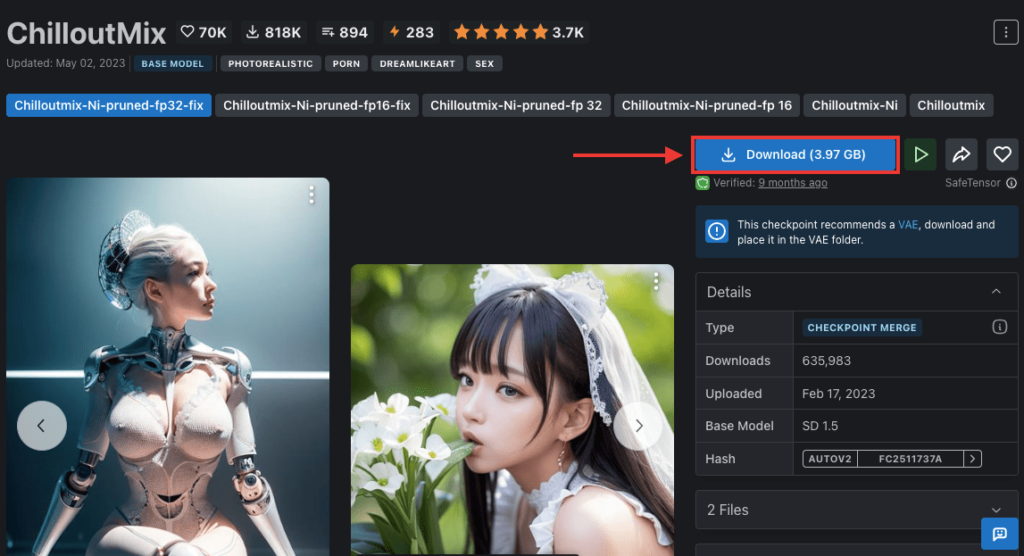
ChilloutMixはCivitAIからダウンロードすることができます。
以下のリンクにアクセスしてください。
ローカル環境の場合
右側にある「Download」をクリックすることでダウンロードすることが出来ます。
ファイルを「models/Stable-diffusion/」の中に入れるようにしてください。
Google Colabの場合
Google ColabでChilloutMixを使う場合は、ダウンロードURLをコピーする必要が有ります。
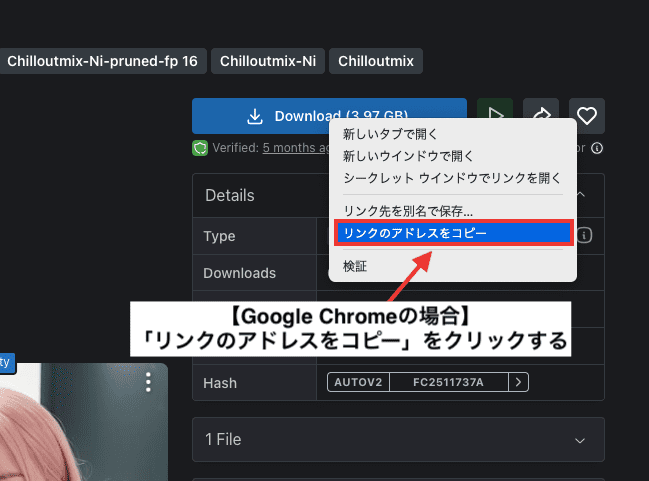
CivitAIにアクセスしたら、右上にある「Download」ボタンにマウスカーソルを合わせてから右クリックしてください。
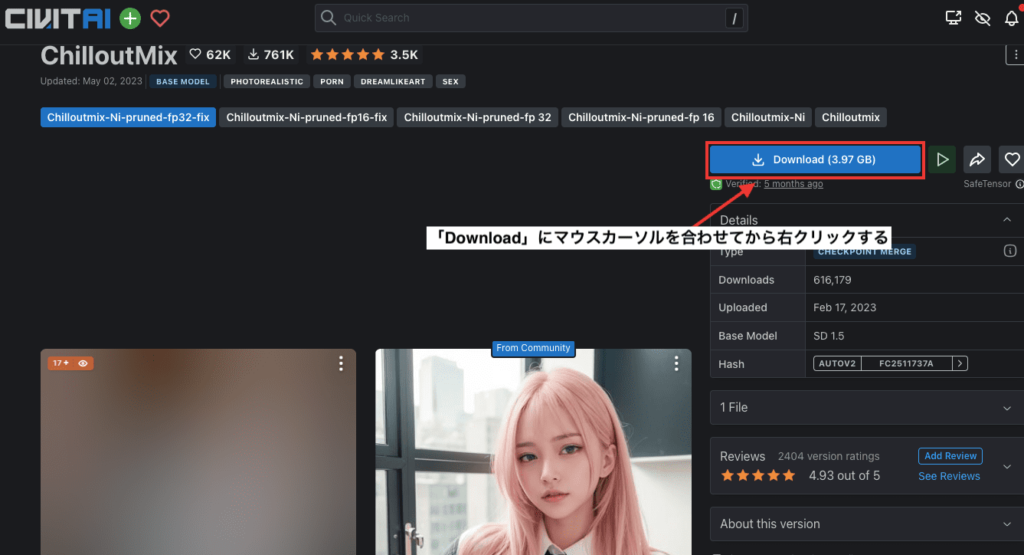
Google Chromeの場合は「リンクのアドレスをコピー」をクリックしてください。
これでChilloutMixのダウンロードURLをコピーすることが出来ます。
Chillout Mixのコードを追加する
Google Colabにアクセスしてください。
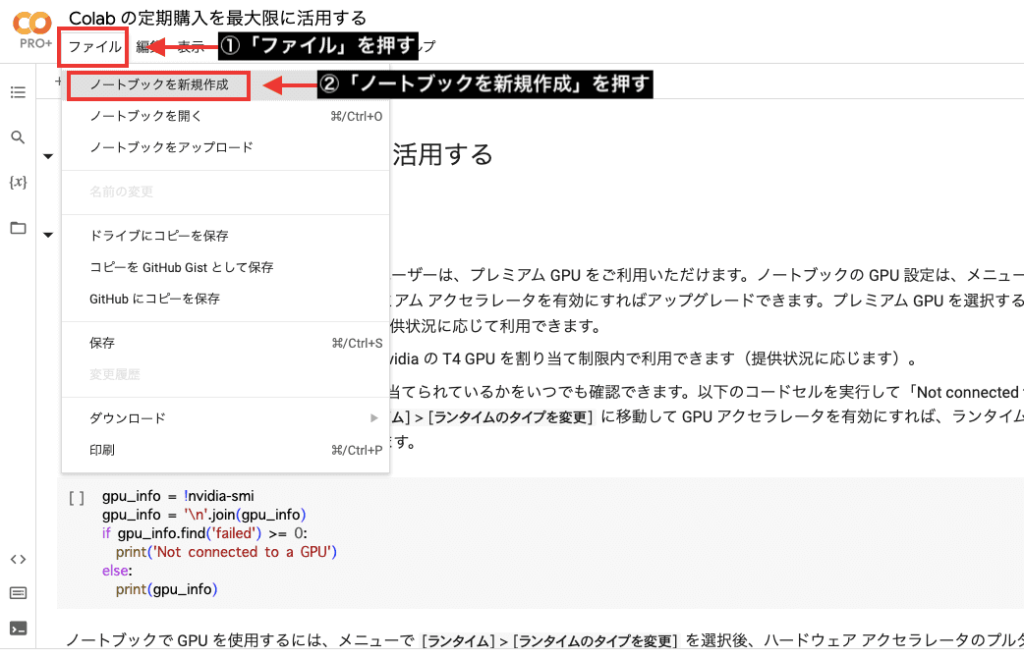
「ファイル」をクリックしてから「ノートブックを新規作成」を押してください。
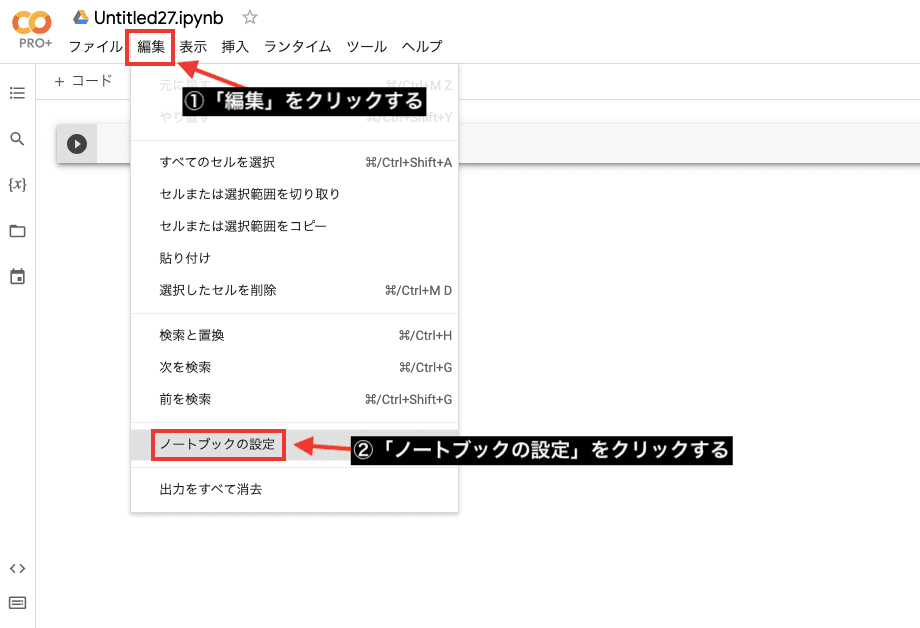
「編集」をクリックしてから「ノートブックの設定」を押してください。
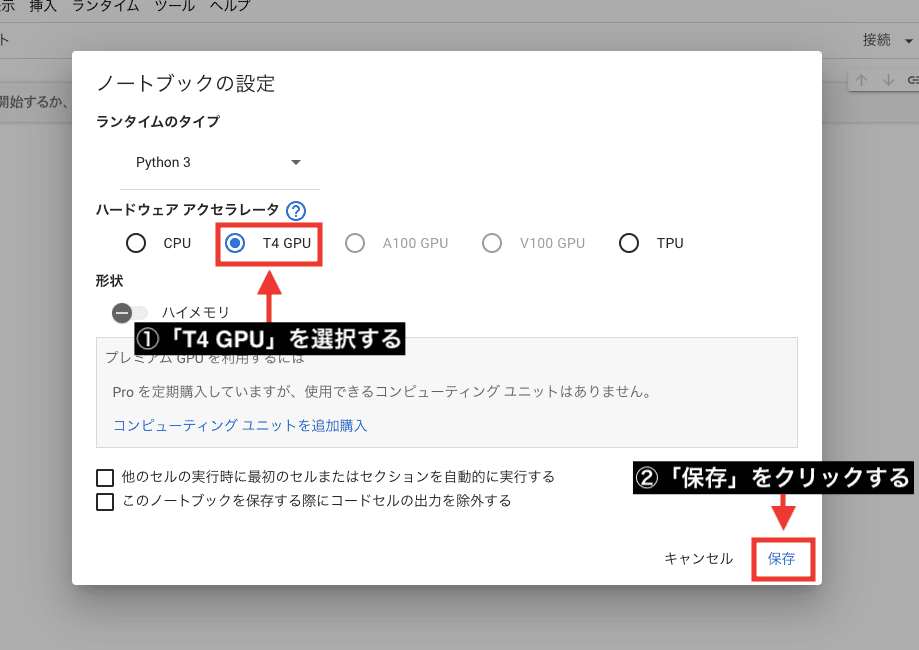
ハードウェアアクセラレータで「GPU」を選択してから「保存」を押してください。
コード内にChilloutMixモデルのコードを追加しましょう。
「models/Stable-diffusion/」の中にchilloutmixのモデルを入れるようにしてください。
ファイル名が「chilloutmix.safetensors」ではエラーが起きて使用できない場合があるので「chilloutmix_chilloutmixNi.safetensors」で記載してください。
コードを入力したら左上にある「実行」ボタンを押してStable Diffusion Web UIを起動してください。
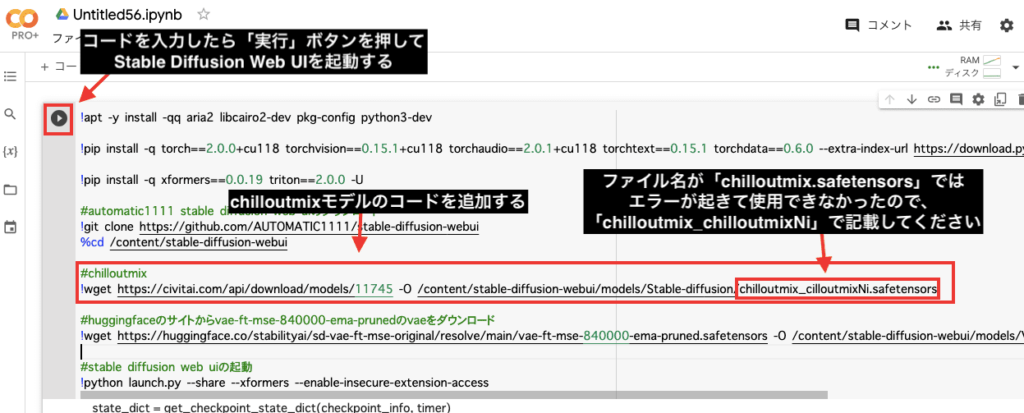
以下はChilloutMixモデルとStable Diffusion Web UIまでを起動させるコードになっているので、コードが分からない人はコピペして使用してください。
!pip install -q torch==2.0.0+cu118 torchvision==0.15.1+cu118 torchaudio==2.0.1+cu118 torchtext==0.15.1 torchdata==0.6.0 --extra-index-url https://download.pytorch.org/whl/cu118 -U

!pip install -q xformers==0.0.19 triton==2.0.0 -U

#automatic1111 stable diffusion web uiのダウンロード
!git clone https://github.com/AUTOMATIC1111/stable-diffusion-webui
%cd /content/stable-diffusion-webui

#chilloutmix
!wget https://civitai.com/api/download/models/11745 -O /content/stable-diffusion-webui/models/Stable-diffusion/chilloutmix_chilloutmixNi.safetensors

#huggingfaceのサイトからvae-ft-mse-840000-ema-prunedのvaeをダウンロード
!wget https://huggingface.co/stabilityai/sd-vae-ft-mse-original/resolve/main/vae-ft-mse-840000-ema-pruned.safetensors -O /content/stable-diffusion-webui/models/VAE/vae-ft-mse-840000-ema-pruned.safetensors

#stable diffusion web uiの起動
!python launch.py --share --xformers --enable-insecure-extension-access
AI美女を生成する
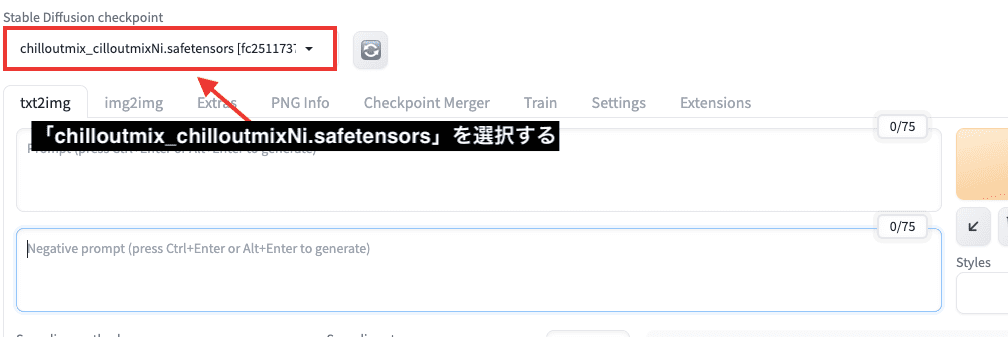
Stable Diffusion Web UIを起動したら、左上にあるCheckpointモデルから「ChilloutMix」を選択して下さい。
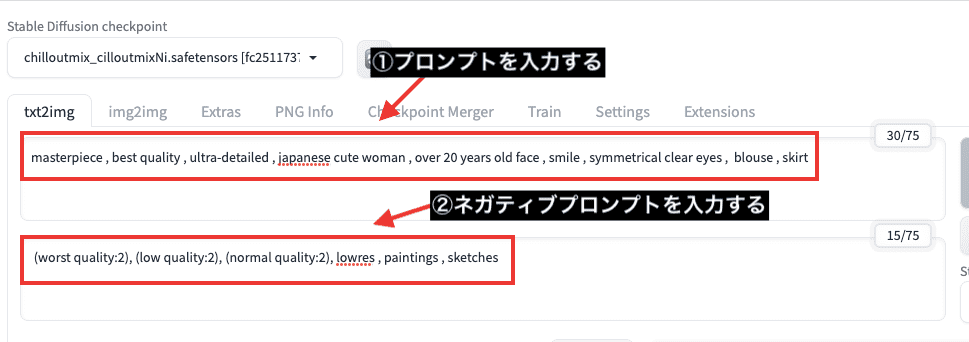
AI美女を生成させるプロンプトとネガティブプロンプトを入力します。
今回の例では、以下のプロンプトとネガティブプロンプトを入力しているので参考にしてください。
masterpiece , best quality , ultra-detailed , japanese cute woman , over 20 years old face , smile , symmetrical clear eyes , blouse , skirt
(worst quality:2) , (low quality:2) , (normal quality:2) , lowres , paintings , sketches
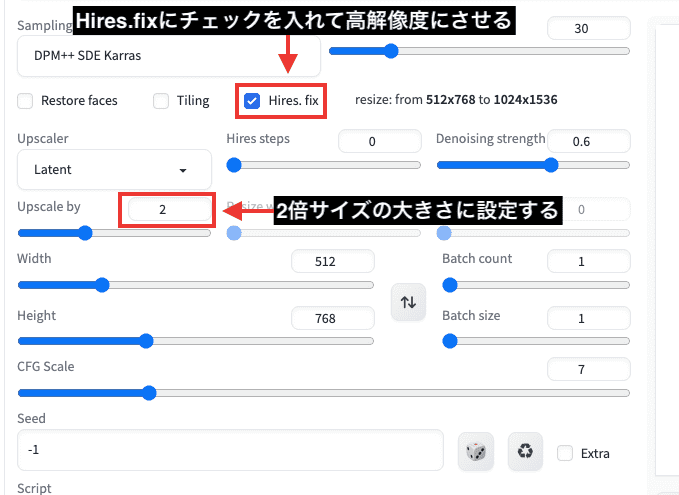
Sampling methodは「DPM++ SDE Karras」を選択してください。

Sampling stepsは「30」くらいに設定してください。

画像サイズは「Width512」「Height768」に設定します。
このサイズ設定にすると、安定して良い画像生成がされやすいのでおすすめです。

Hires.fixにチェックを入れて高解像度にさせます。
Upscalerを「2」の数値に設定して、2倍サイズの「横1024 縦1536」で画像生成させます。
右上の「Generate」ボタンを押して画像生成させてください。
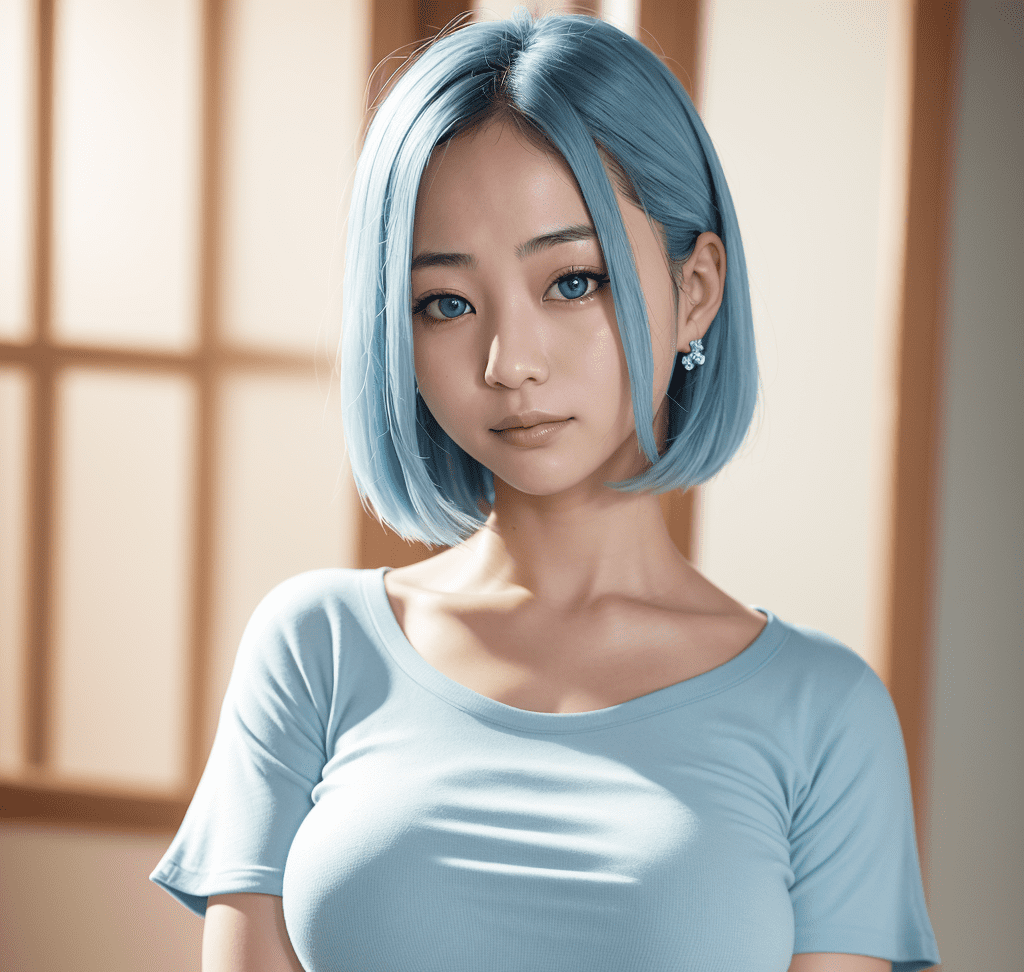
以下の画像は生成した結果になります。
上手くAI美女を生成することができました。
是非参考にして可愛いAI美女を生成してみてください。

クレジット表記と画像の販売について
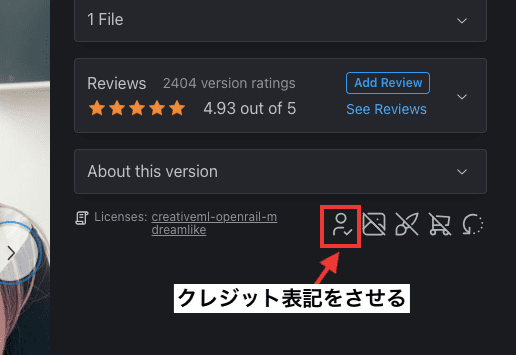
ChilloutMixのサイトを確認すると分かるのですが、人型のアイコンがある場合はクレジット表記をする必要が有ります。
ですから、TwitterなどのSNSで投稿する場合はタグなどにChilloutMixを表記しておきましょう。
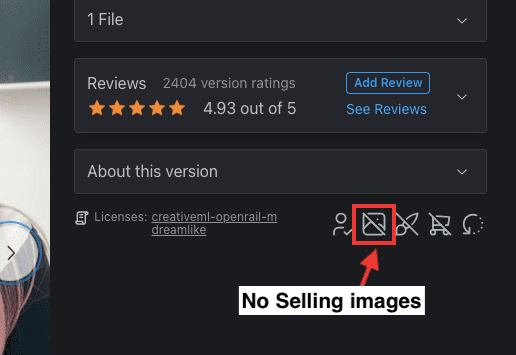
また、画像生成した作品を販売することができないのでチェックしておきましょう。
まとめ
以上でChilloutMixの使い方について解説しました。
ChilloutMixはリアル、実写風でクオリティーの高い画像生成をすることが出来るのでおすすめのモデルです。
可愛いAI美女やAIグラビアが生成出来るので、是非ChilloutMixを使用してみてください!
【クレジット表記】
Chillout Mix


