SDXL-Lightningで画像生成したい!
どうやって使えるの?
「SDXL-Lightning」はSDXLモデルであり
Checkpoint・LoRA・UNetの3つが配布されています。
通常のモデルでは、Step数が20くらいないと綺麗な画像生成は出来ないのですが、
SDXL-Lightningでは、「2〜8」くらいの少ないStep数で綺麗な画像生成をすることが出来るので、高速生成できます!
「SDXL-Lightning」はComfyUIを使用して画像生成することができます。
この記事では、ComfyUIを使ってSDXL-Lightningの導入方法から使い方まで解説します。
SDXL-Lightningを導入する方法

「SDXL-Lightning」のモデルは、Hugging FaceにあるByteDanceのアカウントからダウンロードすることができます。
以下のリンクにアクセスしてください。
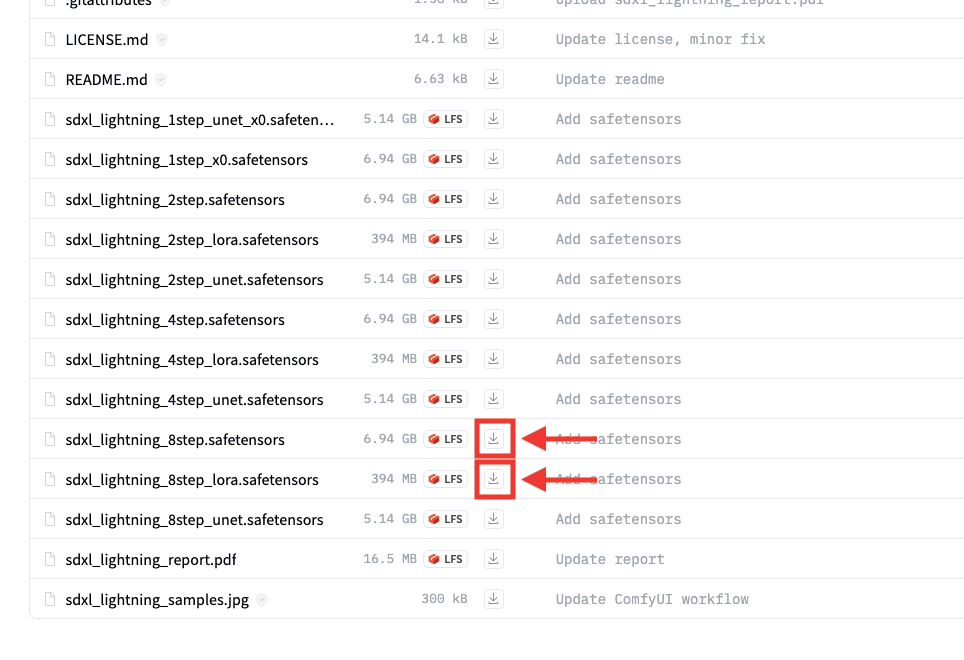
ローカルの方は、「sdxl_lightning_8step.safetensors」と「sdxl_lightning_8step_lora.safetensors」の右側にあるダウンロードアイコンをクリックして、2つのファイルをダウンロードしてください。
「sdxl_lightning_8step.safetensors」のCheckpointモデルは
「/ComfyUI/models/checkpoints」の中にファイルを入れてください。
「sdxl_lightning_8step_lora.safetensors」のLoRAは
「/ComfyUI/models/loras」の中にファイルを入れてください。
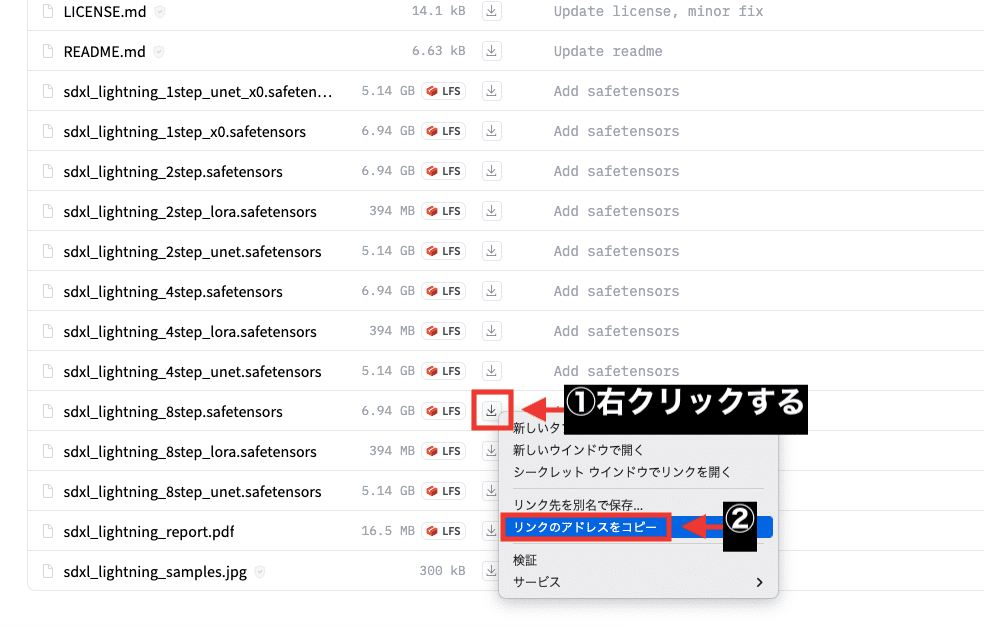
Google ColabかPaperspaceを使用して「SDXL-Lightning」を導入する方は、ダウンロードURLが必要になります。
ダウンロードアイコンで右クリックしてから、Google Chromeを使っている方の場合は「リンクのアドレスをコピー」をクリックすると、ダウンロードURLをコピーできます。
後で「SDXL-Lightning」と「ComfyUI」の導入コードを記載しているので、
ダウンロードURLをコピーしなくても結構です。
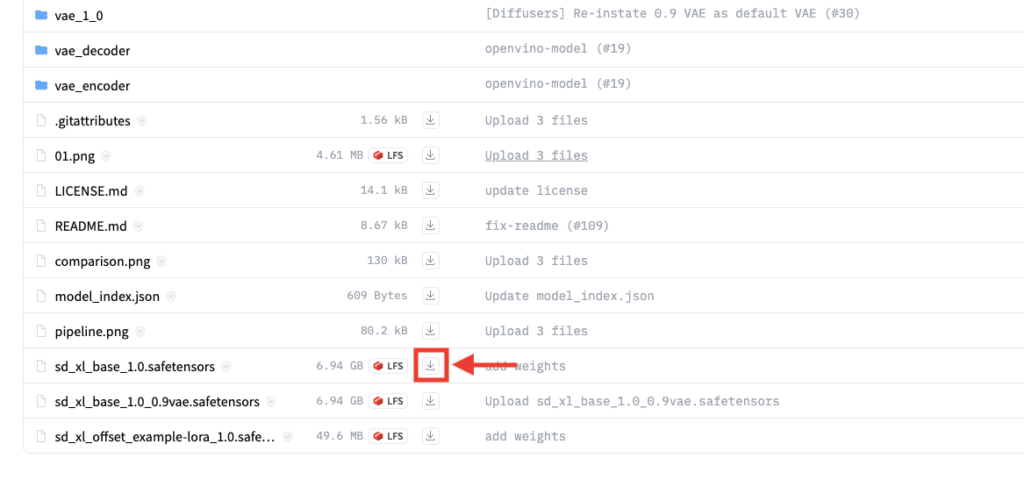
次に「SDXL 1.0」をダウンロードします。
以下のリンクにアクセスしてください。
「sd_xl_base_1.0.safetensors」をダウンロードしてください。
「sd_xl_base_1.0.safetensors」のCheckpointモデルは
「/ComfyUI/models/checkpoints」の中にファイルを入れてください。
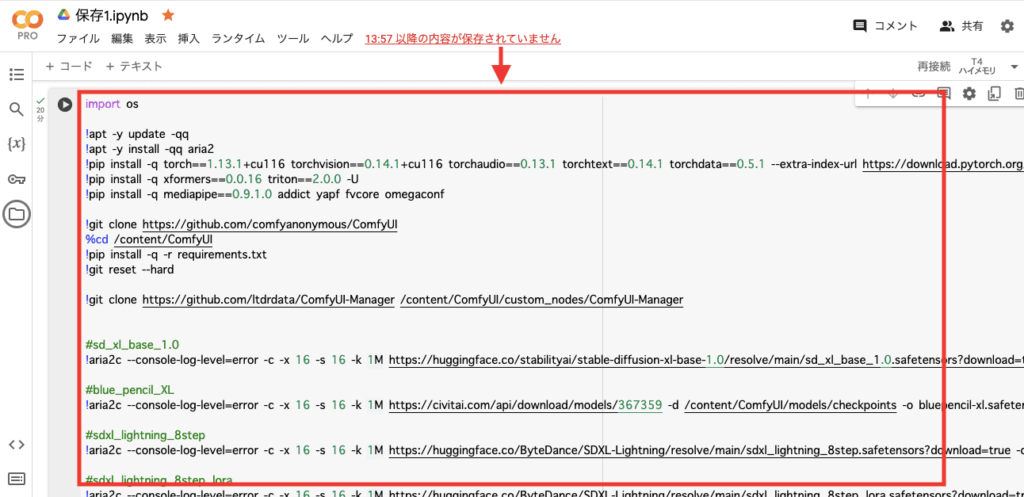
コードを記載する
ここでは、Google Colabを使っている方に「SDXL-Lightning」と「ComfyUI」を導入するサンプルコードを以下に記載しているので参考にしてください。
import os

!apt -y update -qq
!apt -y install -qq aria2
!pip install -q torch==1.13.1+cu116 torchvision==0.14.1+cu116 torchaudio==0.13.1 torchtext==0.14.1 torchdata==0.5.1 --extra-index-url https://download.pytorch.org/whl/cu116 -U
!pip install -q xformers==0.0.16 triton==2.0.0 -U
!pip install -q mediapipe==0.9.1.0 addict yapf fvcore omegaconf

!git clone https://github.com/comfyanonymous/ComfyUI
%cd /content/ComfyUI
!pip install -q -r requirements.txt
!git reset --hard

!git clone https://github.com/ltdrdata/ComfyUI-Manager /content/ComfyUI/custom_nodes/ComfyUI-Manager


#sd_xl_base_1.0
!aria2c --console-log-level=error -c -x 16 -s 16 -k 1M https://huggingface.co/stabilityai/stable-diffusion-xl-base-1.0/resolve/main/sd_xl_base_1.0.safetensors?download=true -d /content/ComfyUI/models/checkpoints -o sdxl_1.0.safetensors

#sdxl_lightning_8step
!aria2c --console-log-level=error -c -x 16 -s 16 -k 1M https://huggingface.co/ByteDance/SDXL-Lightning/resolve/main/sdxl_lightning_8step.safetensors?download=true -d /content/ComfyUI/models/checkpoints -o sdxl_lightning_8step.safetensors

#sdxl_lightning_8step_lora
!aria2c --console-log-level=error -c -x 16 -s 16 -k 1M https://huggingface.co/ByteDance/SDXL-Lightning/resolve/main/sdxl_lightning_8step_lora.safetensors?download=true -d /content/ComfyUI/models/loras -o sdxl_lightning_8step_lora.safetensors


!wget https://github.com/cloudflare/cloudflared/releases/latest/download/cloudflared-linux-amd64 -O /content/cloudflared-linux-amd64 && chmod 777 /content/cloudflared-linux-amd64

import atexit, requests, subprocess, time, re, os
from random import randint
from threading import Timer
from queue import Queue
def cloudflared(port, metrics_port, output_queue):
    atexit.register(lambda p: p.terminate(), subprocess.Popen(['/content/cloudflared-linux-amd64', 'tunnel', '--url', f'http://127.0.0.1:{port}', '--metrics', f'127.0.0.1:{metrics_port}'], stdout=subprocess.DEVNULL, stderr=subprocess.STDOUT))
    attempts, tunnel_url = 0, None
    while attempts < 10 and not tunnel_url:
        attempts += 1
        time.sleep(3)
        try:
            tunnel_url = re.search("(?P<url>https?:\/\/[^\s]+.trycloudflare.com)", requests.get(f'http://127.0.0.1:{metrics_port}/metrics').text).group("url")
        except:
            pass
    if not tunnel_url:
        raise Exception("Can't connect to Cloudflare Edge")
    output_queue.put(tunnel_url)
output_queue, metrics_port = Queue(), randint(8100, 9000)
thread = Timer(2, cloudflared, args=(8188, metrics_port, output_queue))
thread.start()
thread.join()
tunnel_url = output_queue.get()
os.environ['webui_url'] = tunnel_url
print(tunnel_url)

!python main.py --dont-print-server
SDXL-Lightningの使い方

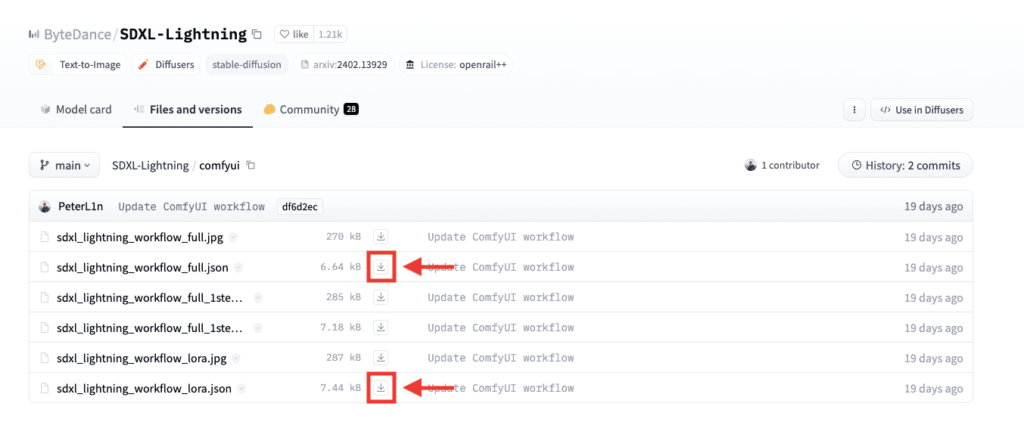
ComfyUIを起動したら、SDXL-Lightningを使用するためのworkflowファイルをダウンロードします。
以下のリンクにアクセスしてください。
「sdxl_lightning_workflow_full.json」と「sdxl_lightning_workflow_lora.json」の2つのファイルをダウンロードしてください。
SDXL-LightningのCheckpointを使用して画像生成する
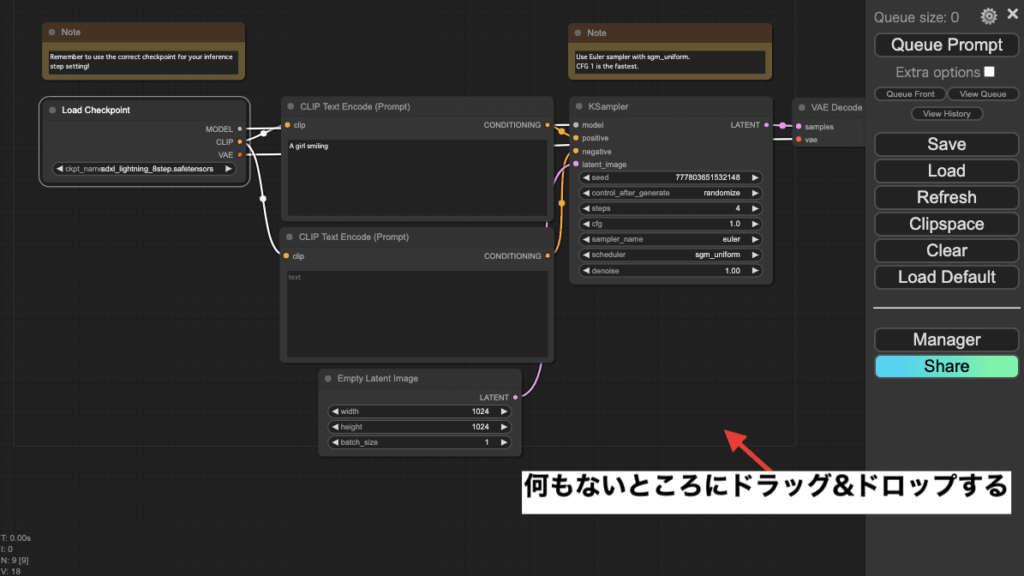
ダウンロードした「sdxl_lightning_workflow_full.json」のファイルを、
ComfyUI内の何もないところにドラッグ&ドロップしてください。
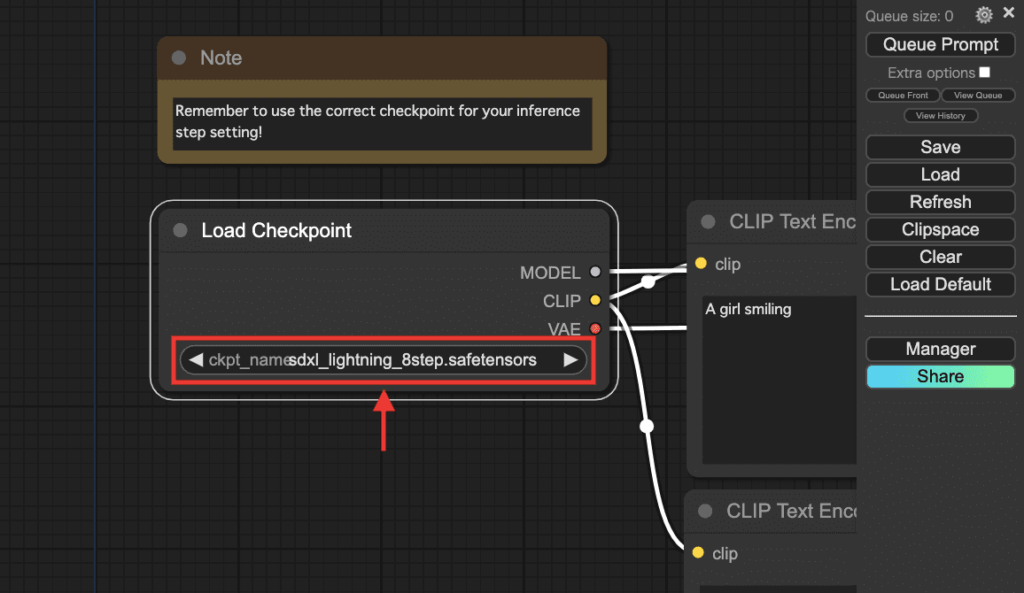
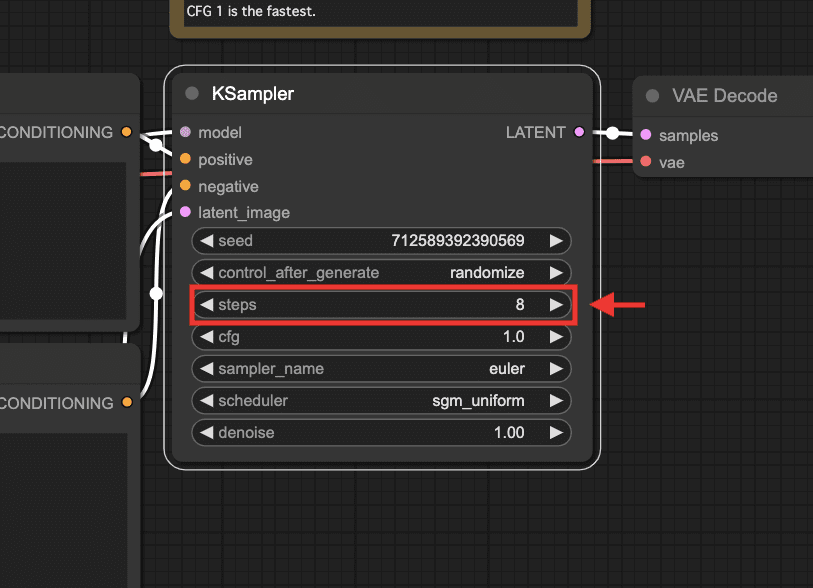
「Load Checkpoint」内で「sdxl_lightning_8step.safetensors」を選択してください。
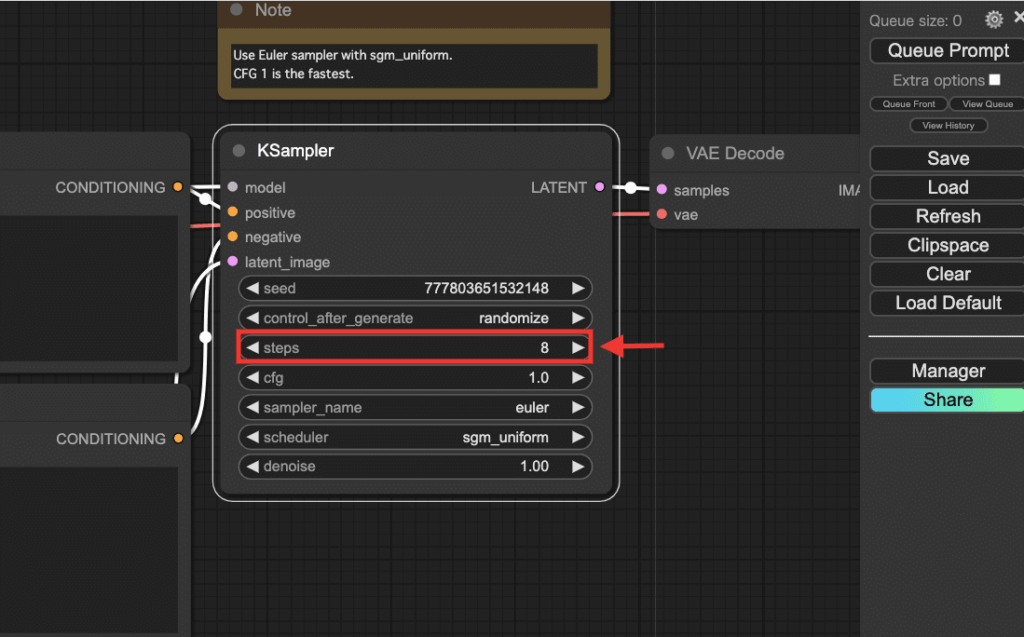
「steps」を「8」くらいに設定してください。
以下の画像では、「steps」の数値を「1」「4」「8」「12」で生成した結果になります。
通常では、stepsを「4」にして生成するとぼやけている段階なのですが、
「SDXL-Lightning」では、steps「4」で人物を綺麗に生成することができます!

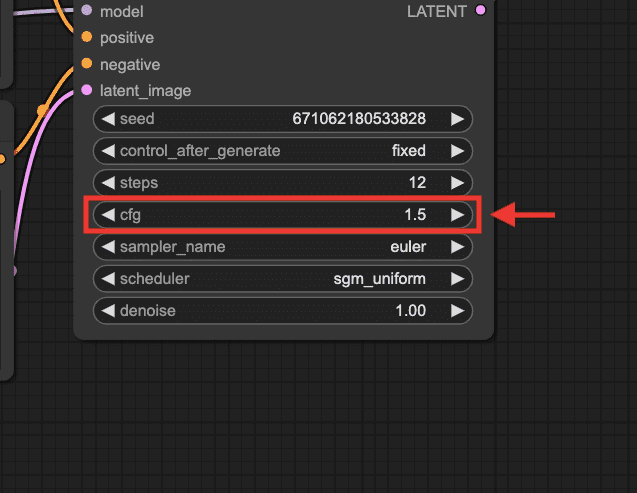
「cfg」は「1〜3」くらいに設定しましょう。
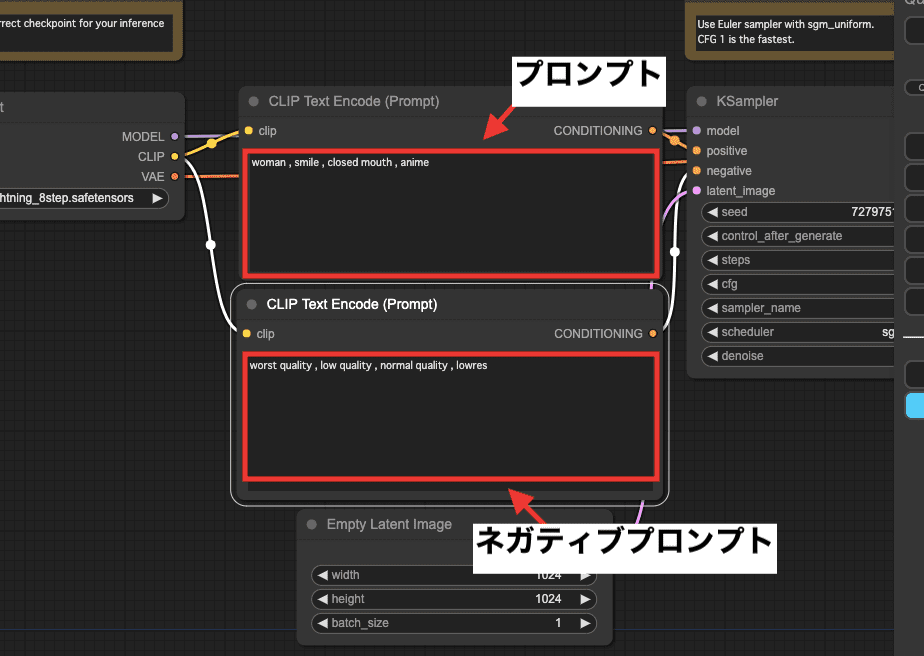
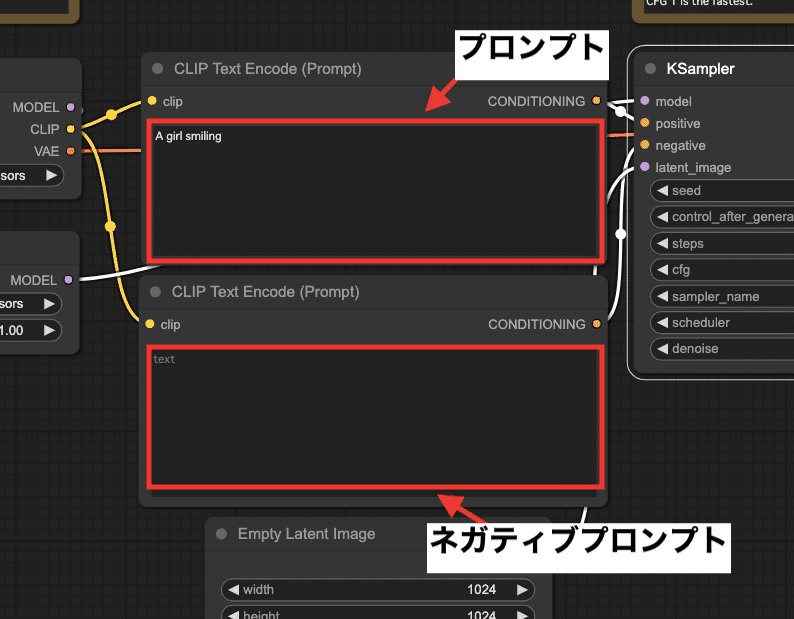
上部にある「CLIP Text Encode(Prompt)」はプロンプトとなっているので、画像生成したい内容を入力してください。
下部にある「CLIP Text Encode(Prompt)」はネガティブプロンプトとなっているので、画像生成したくない内容を入力してください。
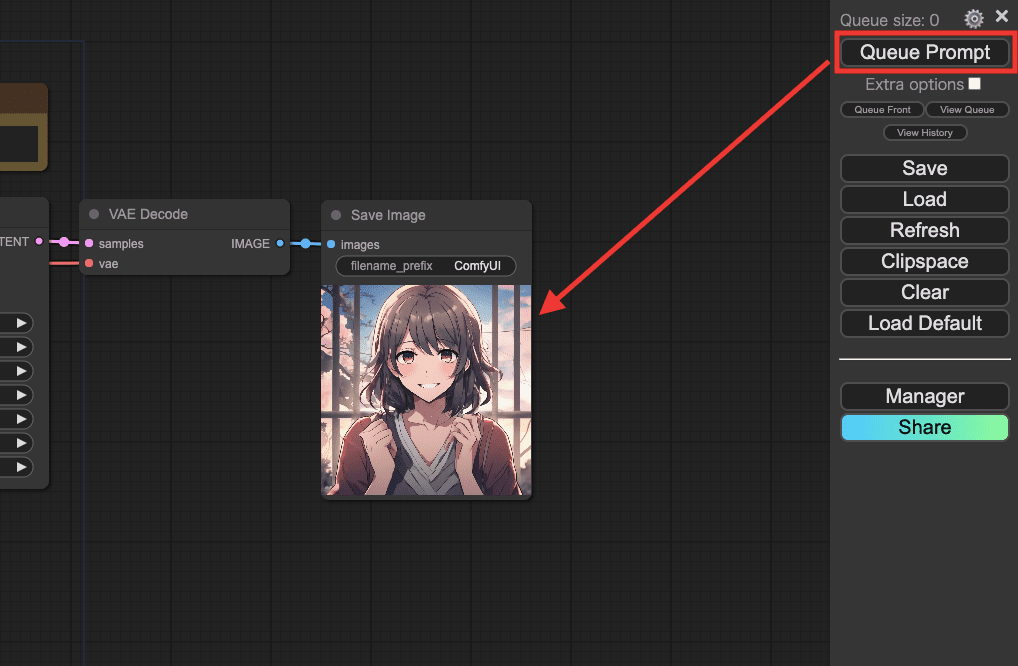
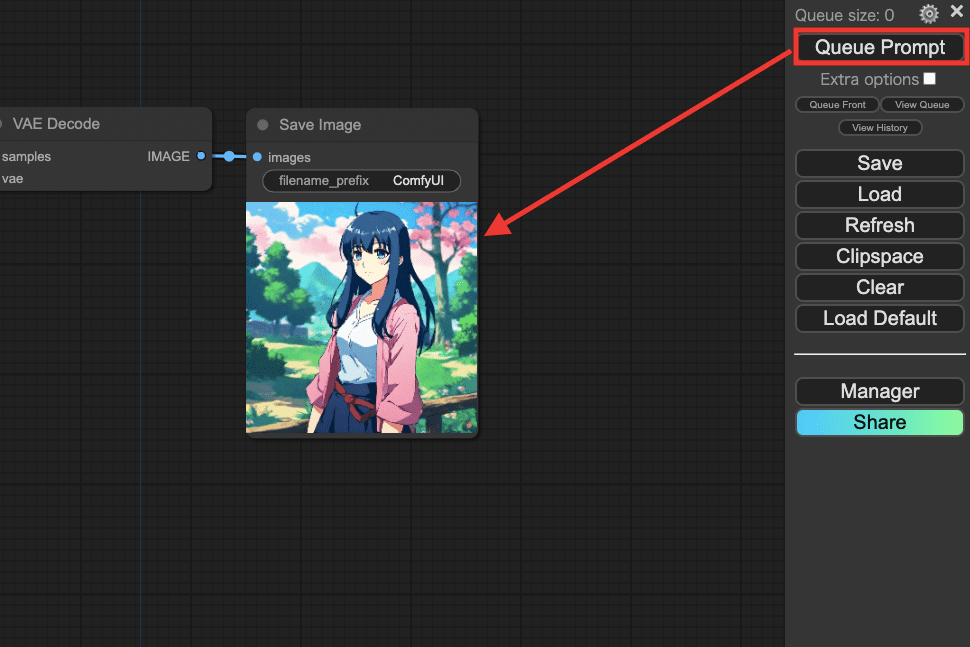
設定が完了したら「Queue Prompt」をクリックすると画像生成することができます。
SDXL-LightningのLoRAを使用して画像生成する
次は、SDXL-LightningのLoRAを使用して画像生成する方法について解説します。
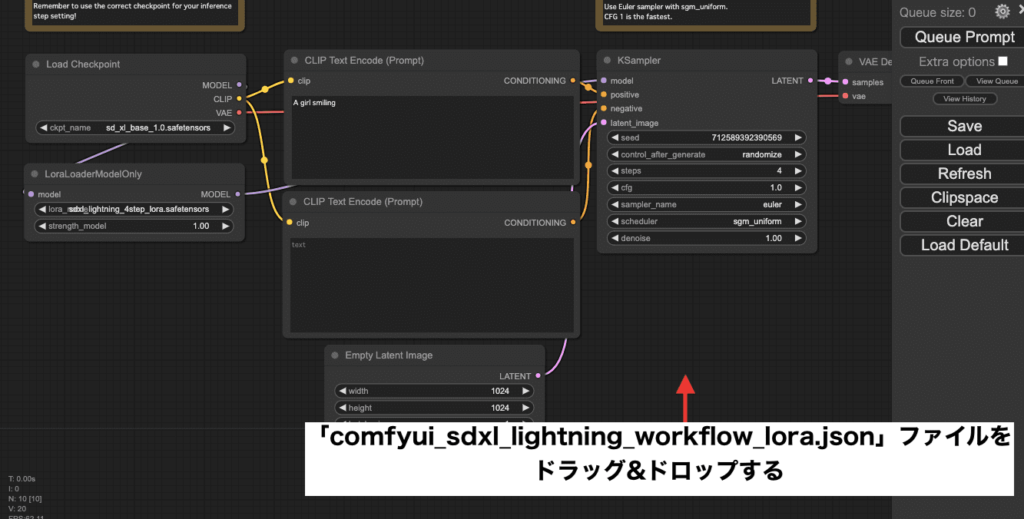
「comfyui_sdxl_lightning_workflow_lora.json」ファイルを、何もないところにドラッグ&ドロップしてください。
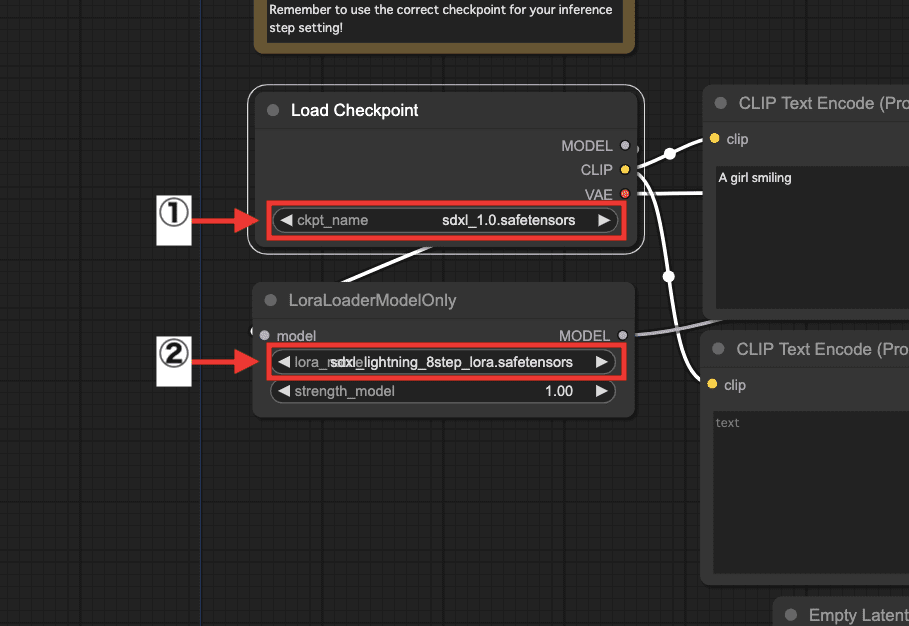
「Load Checkpoint」内で、「sdxl_1.0.safetensors」か「sdxl_lightning_8step.safetensors」を選択してください。
「LoraLoaderModelOnly」内で、「sdxl_lightning_8step_lora.safetensors」を選択してください。
「steps」で「8」くらいに設定してください。
プロンプトとネガティブプロンプトを入力してください。
「Queue Prompt」をクリックすると、「SDXL-Lightning」のLoRAを使用した画像生成をすることができます。
別のSDXLモデルを使用して画像生成する
CheckpointをCivitAIやHugging Faceにある別のSDXLモデルにして、
LoRAに「SDXL-Lightning」を使用して画像生成することもできます。
この例では、CivitAIにある「blue_pencil-XL」のCheckpointを使用して画像生成してみます。
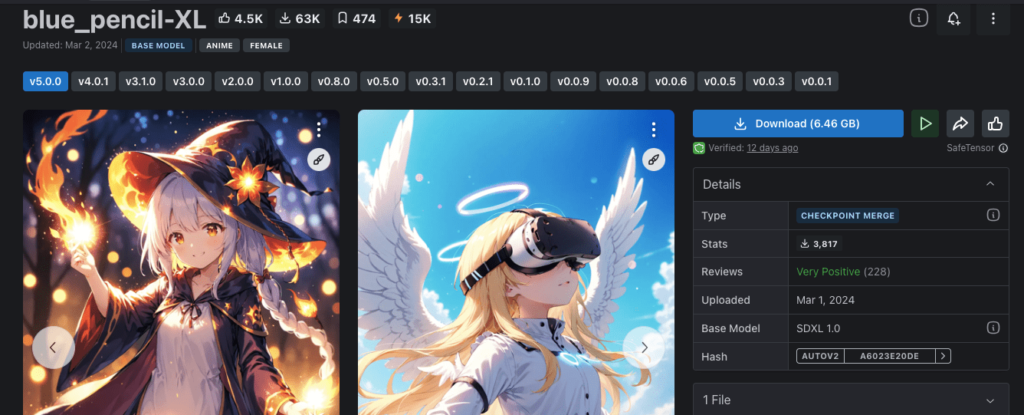
「blue_pencil-XL」は以下のリンクからダウンロードできます。
「Load Checkpoint」内で、導入した「bluepencil-xl.safetensors」を選択します。
「LoraLoaderModelOnly」内で、SDXL-LightningのLoRAである「sdxl_lightning_8step_lora.safetensors」を選択します。
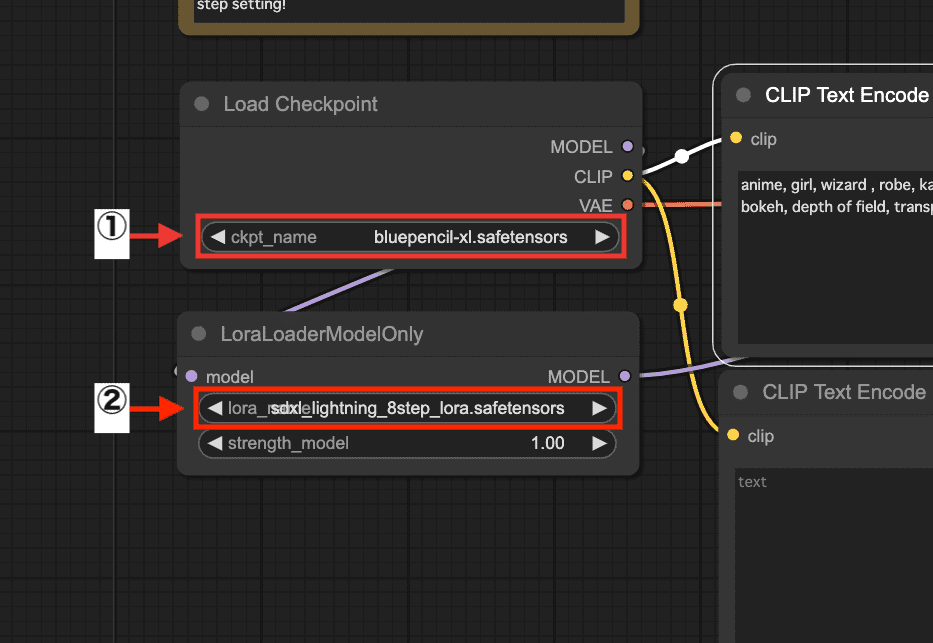
「steps」を「8」に設定します。
画像生成すると、「blue_pencil-XL」のモデルで早く生成することができます。

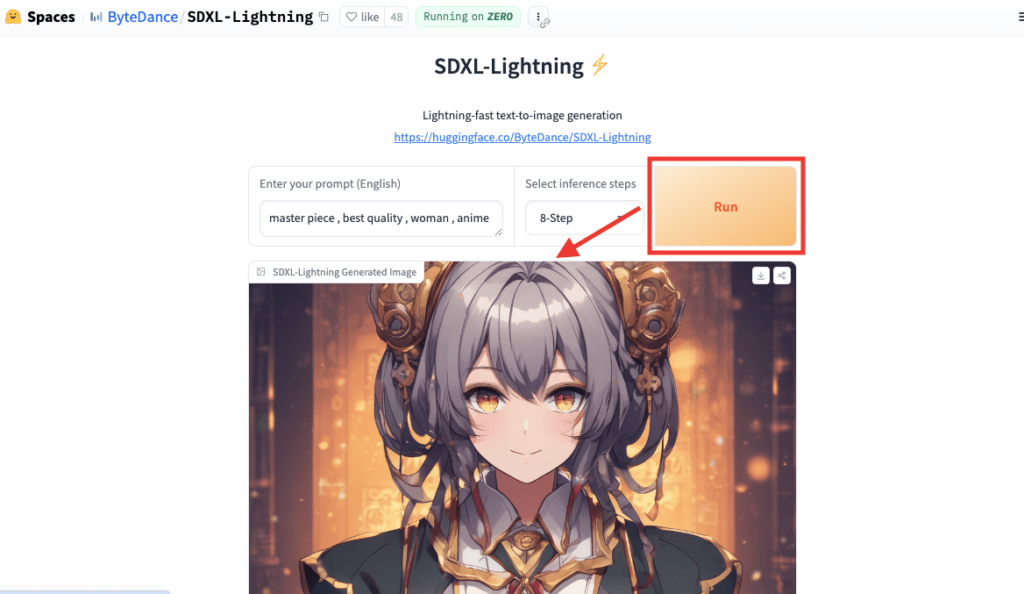
デモ版で画像生成する

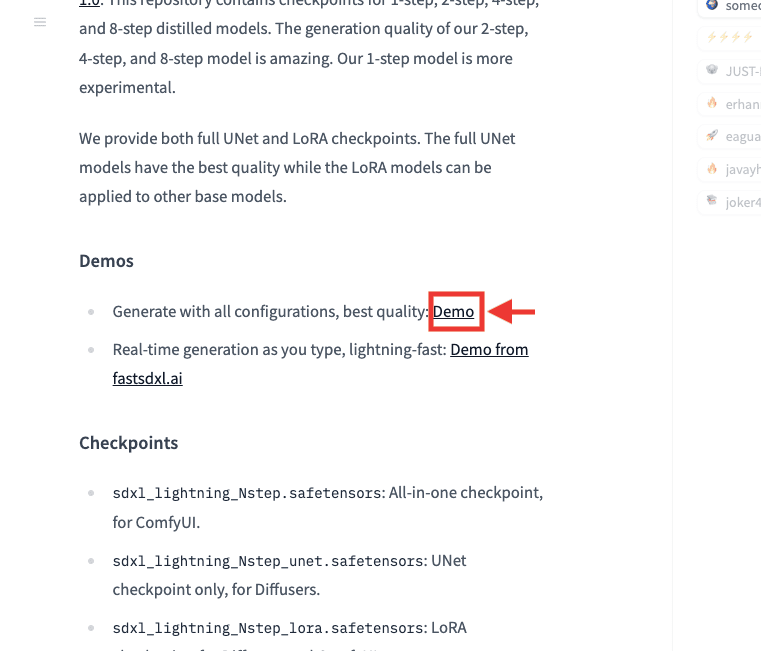
「SDXL-Lightning」のモデルを配布しているサイト内では、
「Demo」をクリックすることで、デモ版を使用することができます。
お試し用なので、ComfyUIを使用する必要なく画像生成できます。
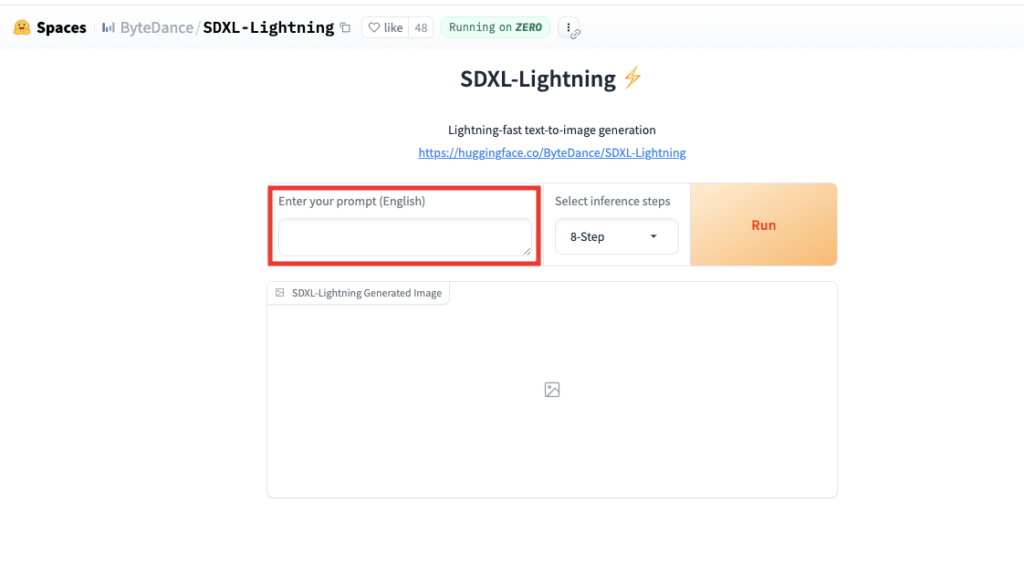
テキスト入力場所で画像生成したい内容を入力してください。
「Select inference steps」でstep数を設定してください。
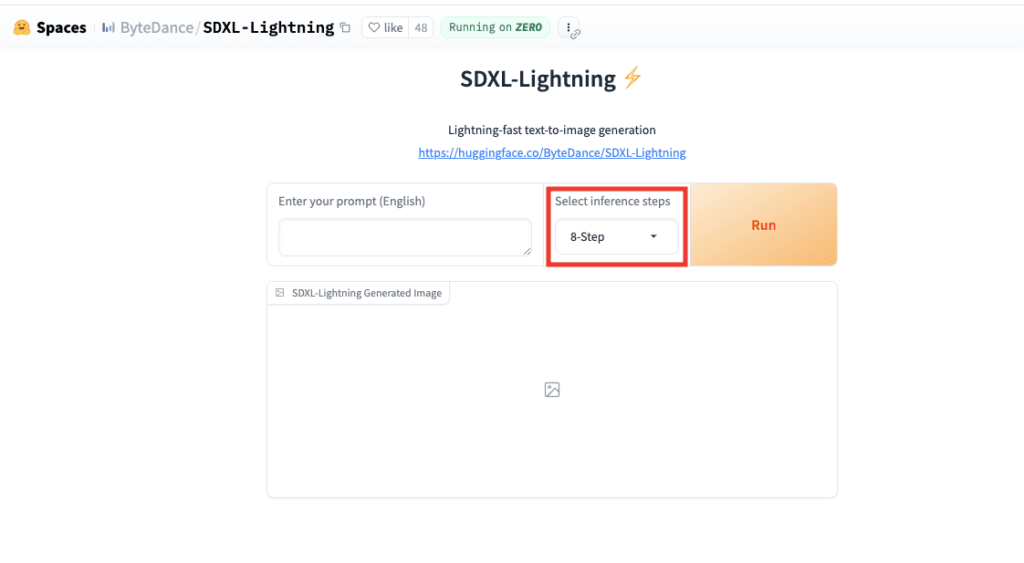
「Run」をクリックすると画像生成することができます。
まとめ

「SDXL-Lightning」の導入方法と使い方について解説しました。
・ComfyUIで「SDXL-Lightning」を使用することができる
・少ないStep数で綺麗な画像生成をすることができる
・デモ板ではComfyUIを使用する必要なく「SDXL-Lightning」で画像生成できる
「SDXL-Lightning」を使用すると高速生成することが出来るので
是非記事を参考に利用してみてください。
他に高速生成できる方法に「SDXL Turbo」と「LCM」があります。
それぞれの使い方について以下の記事で解説しているので気になった方は読んでみてください。