
Counterfeitの導入方法を知りたい!
どうやって使えるの?
CounterfeitのモデルはHugging FaceかCivitAIのサイトからダウンロード・導入することが出来ます。
この記事では、Google ColabでCounterfeitの導入方法や使い方について解説します。
CounterfeitのダウンロードURLをコピーする

最初にCounterfeitのダウンロードURLを取得しましょう。
Counterfeitでは、Hugging FaceとCIVITAIからダウンロードすることができます。
ここでは、どちらもダウンロードURLの取得方法について解説します。
Hugging Faceの場合
CounterfeitをHugging Faceでダウンロード・ダウンロードURLをコピーする場合は以下のリンクから可能なのでアクセスしてください。
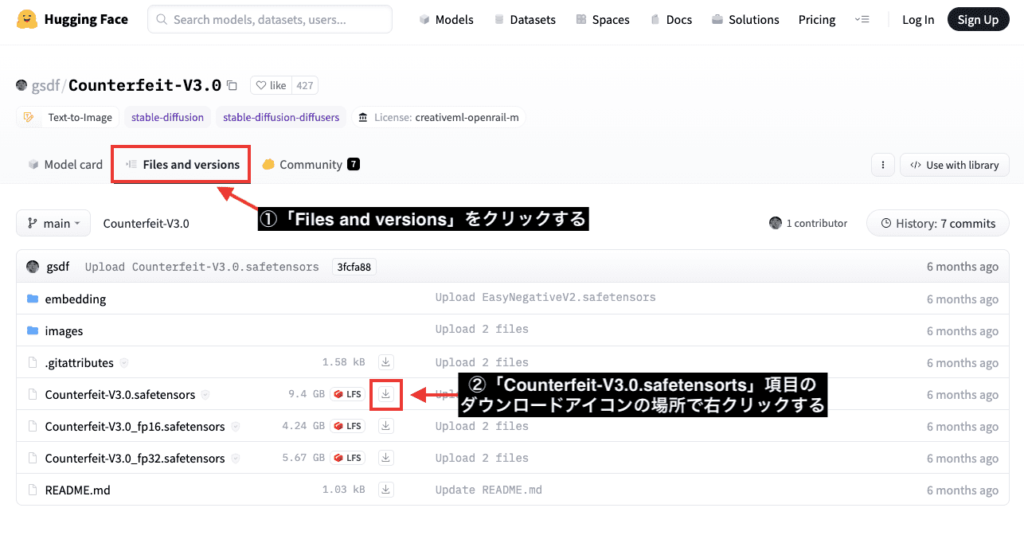
Google ColabでCounterfeitを導入するためにダウンロードURLをコピーします。
「Files and versions」をクリックしてください。
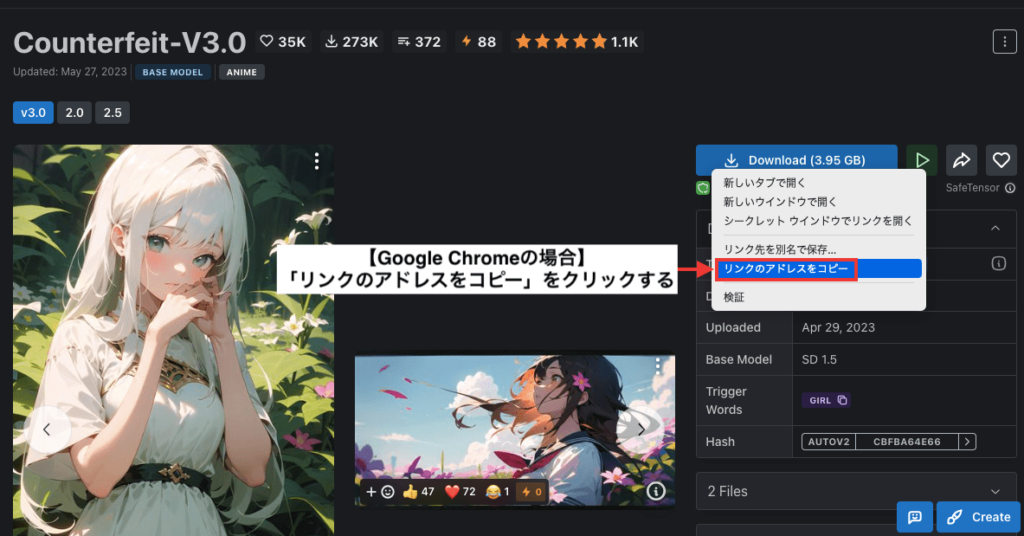
「Counterfeit-V3.0.safetensors」項目のダウンロードアイコンの場所で右クリックしてください。
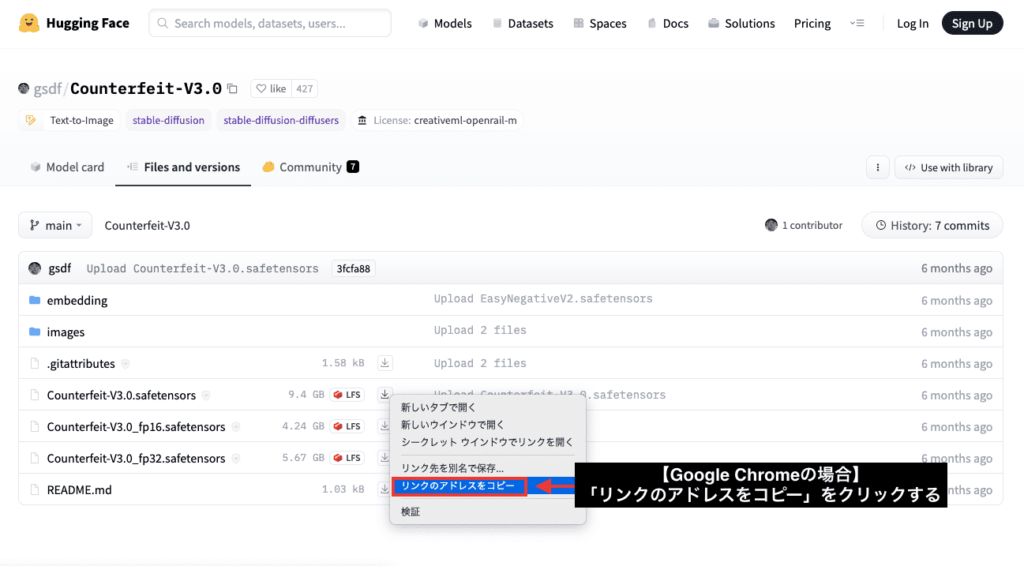
Google Chromeの場合は「リンクのアドレスをコピー」をクリックしてダウンロードURLをコピーしてください。
CivitAIの場合
Hugging Face以外でもCivitAIからCounterfeitのダウンロードURLをコピーすることが出来ます。
以下のリンクにアクセスしてください。

「Download」ボタンの場所で右クリックしてください。
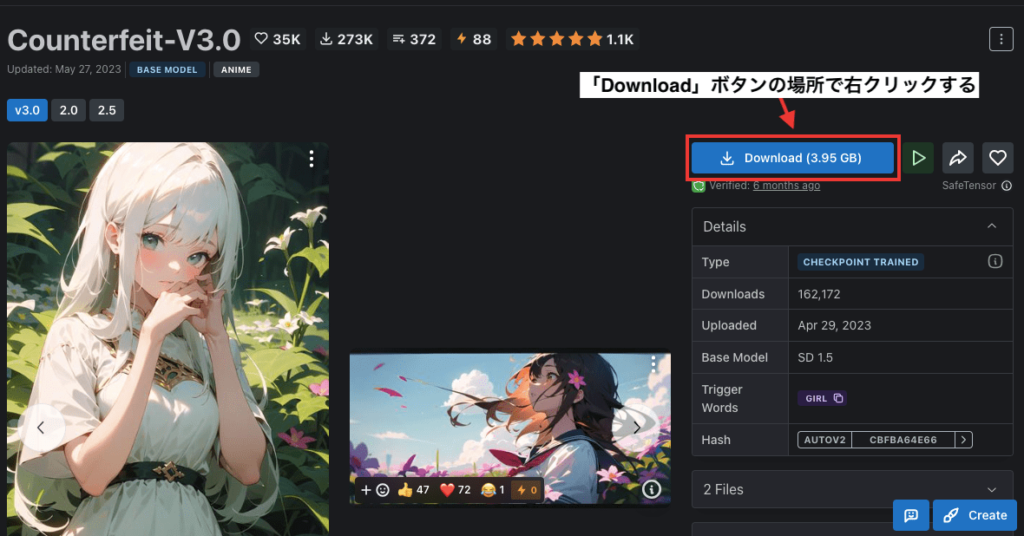
「リンクのアドレスをコピー」をクリックすることでダウンロードURLをコピーすることが出来ます。
easynegativeのダウンロードURLをコピーする

Hugging FaceでCounterfeitのモデルを配布されている著作者の場所には
easynegativeと呼ばれるモデルも配布されています。
easynegativeを導入することで全体のクオリティーを高くすることができるので
一緒に導入しておくことを推奨します。
Hugging Faceの場合
easynegativeをダウンロードするには以下のリンクにアクセスしてください。
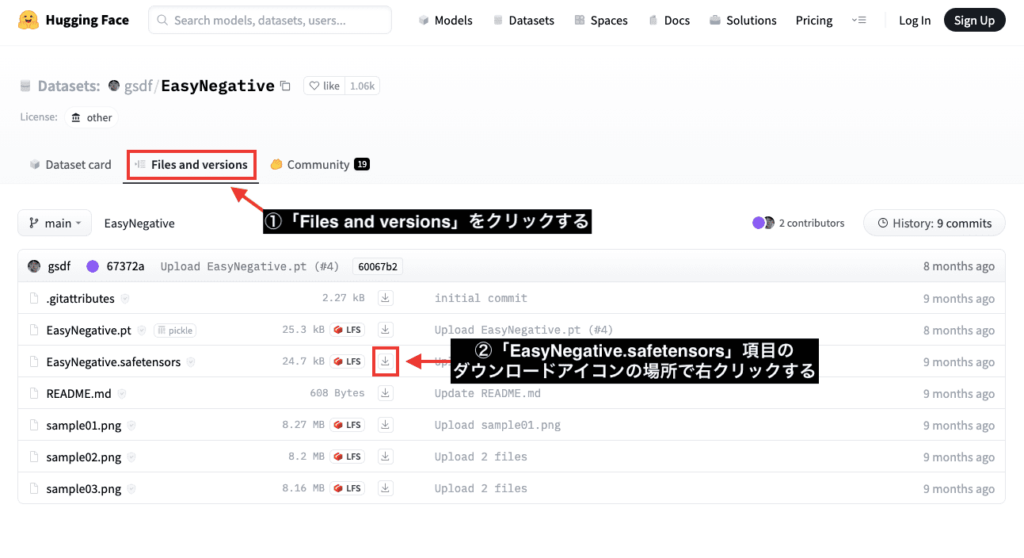
「Files and versions」をクリックしてください。
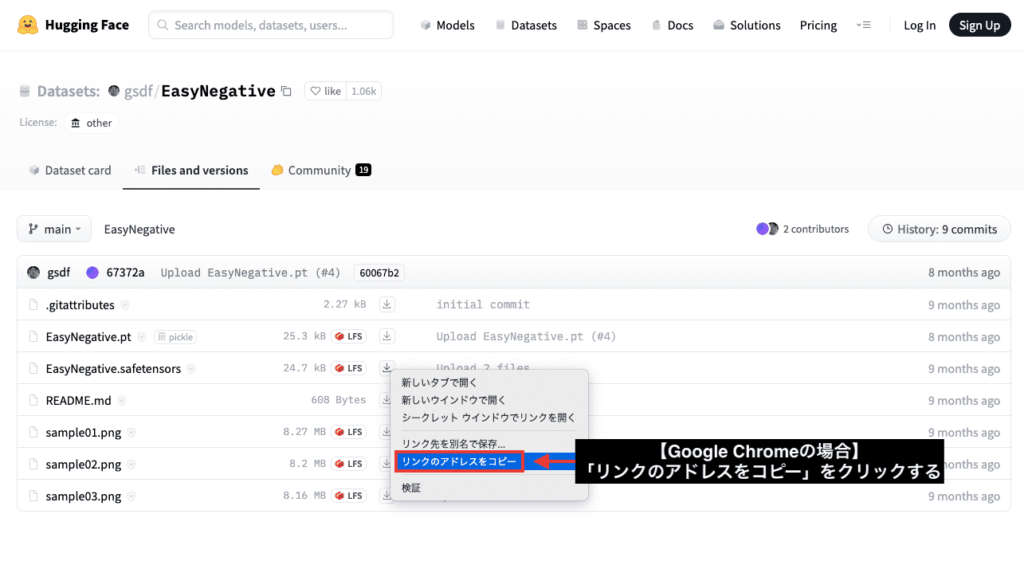
「EasyNegative.safetensors」項目の右側にあるダウンロードアイコンの場所で右クリックしてください。
「リンクのアドレスをコピー」をしてダウンロードURLをコピーしてください。
CivitAIの場合
CivitAIにもeasynegativeは配布されています。
以下のリンクからダウンロードURLを取得することが出来ます。

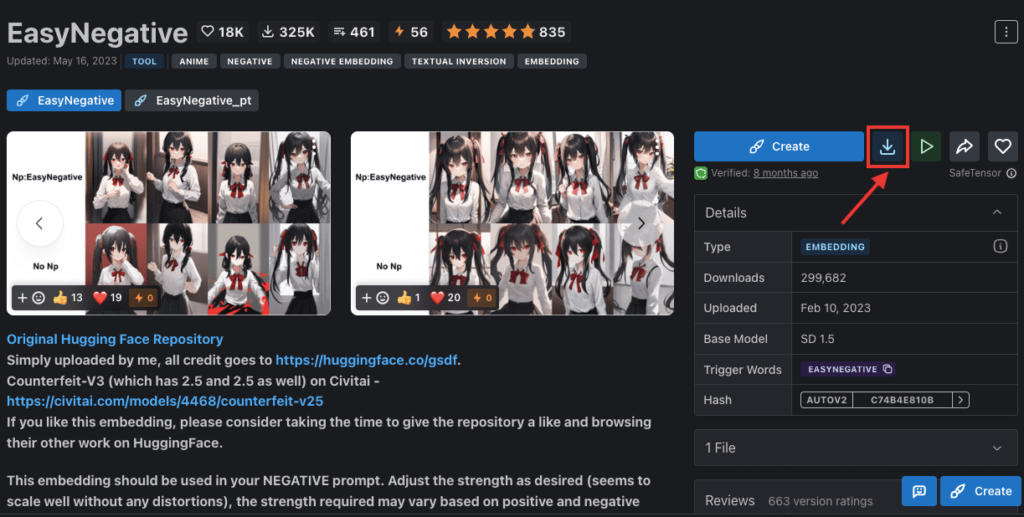
右側にあるダウンロードアイコンをクリックします。
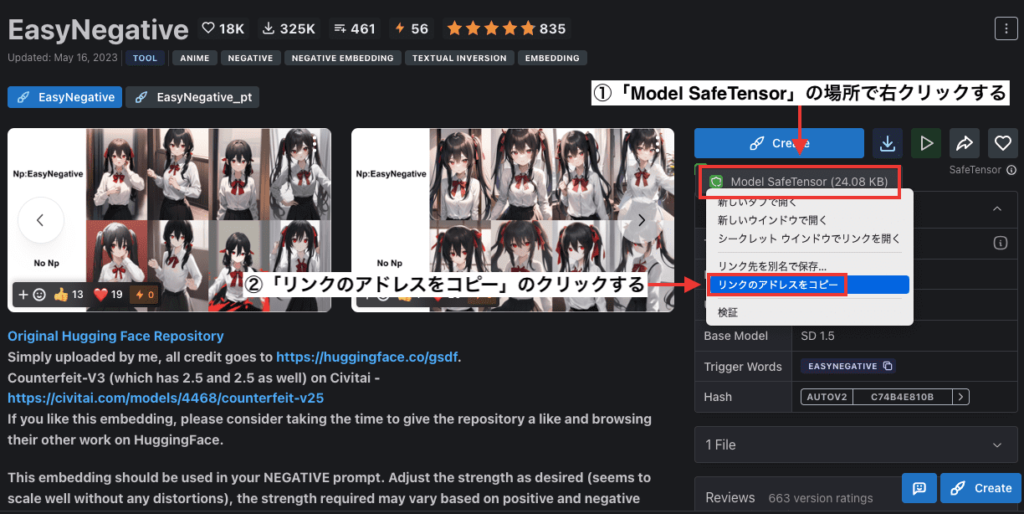
「Model SafeTensor」の場所で右クリックして「リンクのアドレスをコピー」をクリックすることで可能です。
Google Colabにコードを追加する方法

Counterfeitのコードの導入方法
Hugging FaceでCounterfeitのダウンロードURLをコピーした場合は、
以下のコードにある(ダウンロードURL)の場所を削除してからペーストしてください。
!wget (ダウンロードURL) -O /content/stable-diffusion-webui/models/Stable-diffusion/Counterfeit-V3.0.safetensors
ペースト後は以下のようになります。
これでCounterfeitの導入をすることが出来ます。
!wget https://huggingface.co/gsdf/Counterfeit-V3.0/resolve/main/Counterfeit-V3.0.safetensors -O /content/stable-diffusion-webui/models/Stable-diffusion/Counterfeit-V3.0.safetensors
先ほどと同じようにCIVITAIでダウンロードURLをコピーしてペーストした場合は以下の赤字部分のようになります。
!wget https://civitai.com/api/download/models/57618 -O /content/stable-diffusion-webui/models/Stable-diffusion/counterfeit-v30.safetensorseasynegativeのコードの導入方法
次はeasynegativeの導入方法ですが、Hugging FaceのダウンロードURLを以下の(ダウンロードURL)部分を削除してペーストしてください。
!wget (ダウンロードURL) -O /content/stable-diffusion-webui/embeddings/easynegative.safetensors
ペースト後は以下のようになります。
これでeasynegativeを導入することが出来ます。
!wget https://huggingface.co/datasets/gsdf/EasyNegative/resolve/main/EasyNegative.safetensors -O /content/stable-diffusion-webui/embeddings/easynegative.safetensors
CIVITAIでダウンロードURLを同じ場所にペーストした場合は以下になります。
!wget https://civitai.com/api/download/models/9208 -O /content/stable-diffusion-webui/embeddings/easynegative.safetensors
CheckpointモデルであるCounterfeitの場合は「Stable-diffusion/」の中にファイルを入れますが、easynegativeの場合は「embeddings/」の中にファイルを入れないとエラーが起きて使用できないので確認しておきましょう。
Counterfeitとeasynegativeの使い方

Stable Diffusion Web UIを起動したら左上にあるStable Diffusion checkpoint項目の中で「Counterfeit-V3.0.safetensors」を選択することで使用することが出来ます。

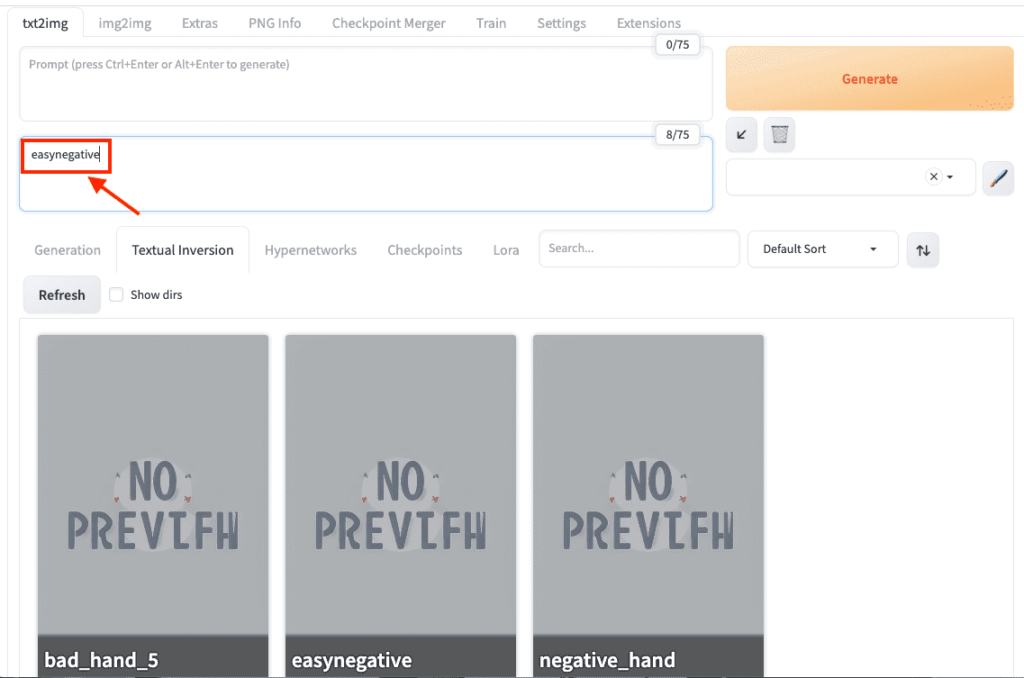
easynegativeを使う場合は、ネガティブプロンプト内を1度クリックして下さい。
「Textual Inversion」をクリックしてください。
「easynegative」を選択してください。
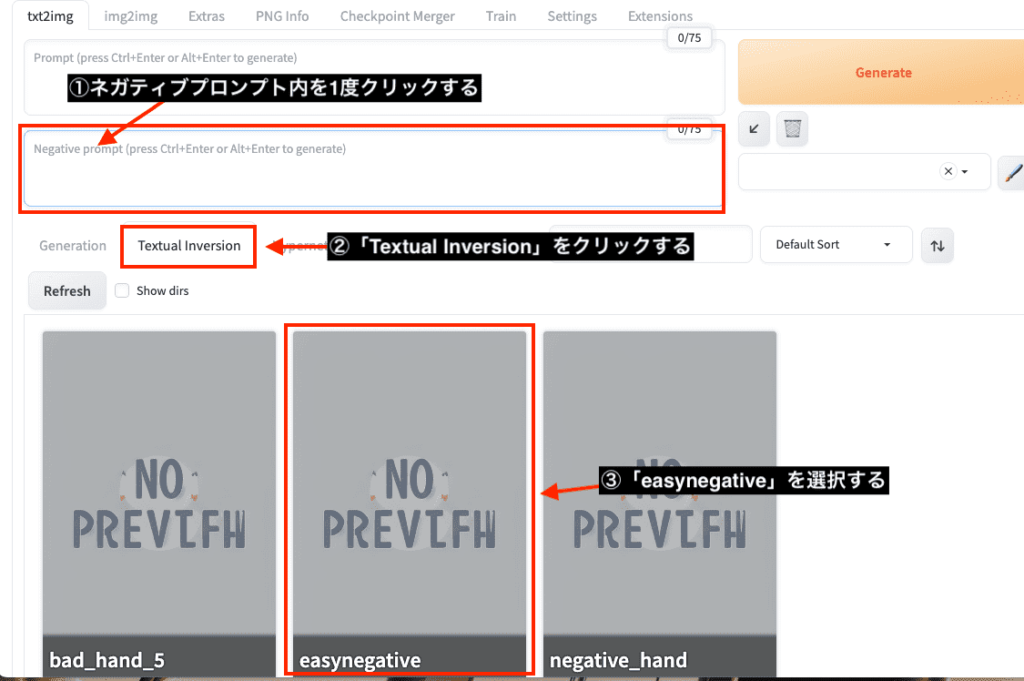
ネガティブプロンプト内に「easynegative」が追加されるので使用することが出来ます。
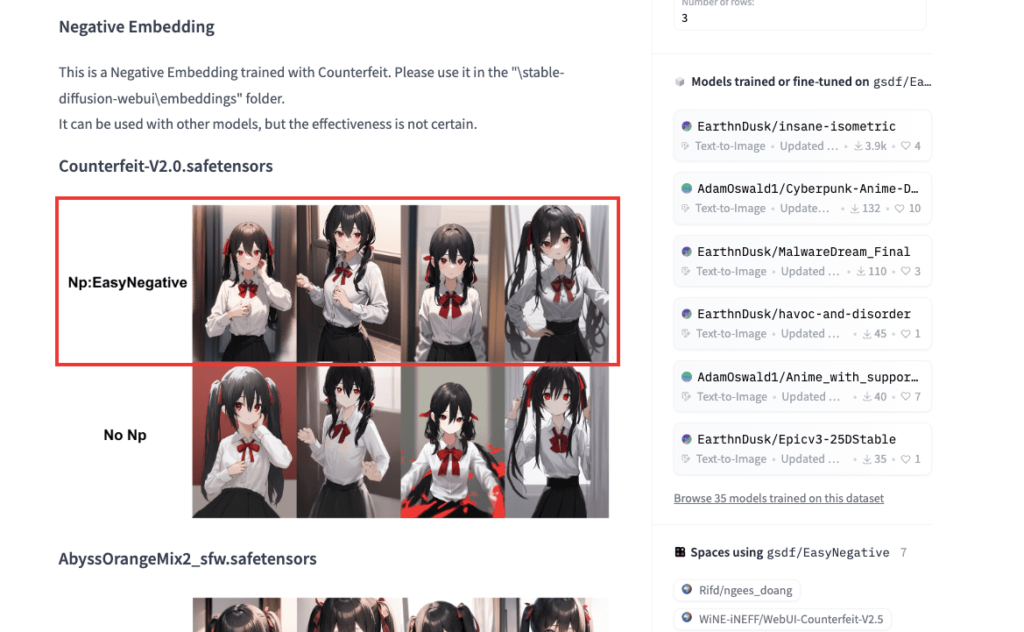
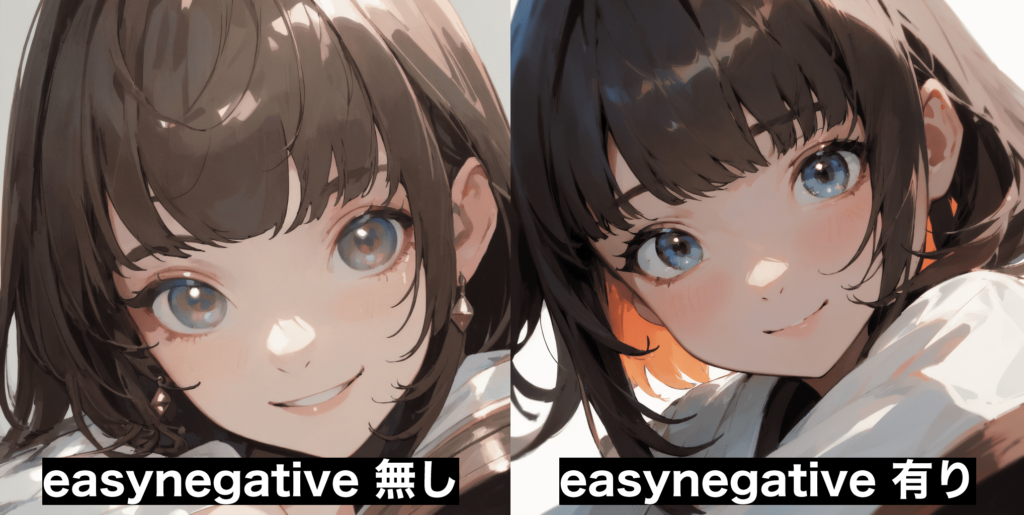
以下の画像では、easynegativeを使用しない場合と使用した場合の比較結果になります。
easynegativeを使用した方が全体的にクオリティーが高くなっていることが確認できます。
このようにeasynegativeは質を高くしやすい傾向にあるので導入することをおすすめします。
まとめ

Counterfeitの導入と使い方について解説しました。
Counterfeitは、高品質なアニメ風の画像を生成することが出来るモデルなのでおすすめです!
easynegativeも導入して使用することで
さらに高クオリティーで画像生成することが出来ます。
是非活用してみてください。