「Stable Diffusion WebUI Forgeって何か分からない…」
「Stable Diffusion WebUI Forgeを使いたいけど導入方法が分からない…」
と困っていませんか?
「Stable Diffusion WebUI Forge」は、「Stable Diffusion WebUI(AUTOMATIC1111)」と同じように画像生成することができる機能となっています。
AUTOMATIC1111よりも高速生成できたりVRAMを抑えることが出来ます!
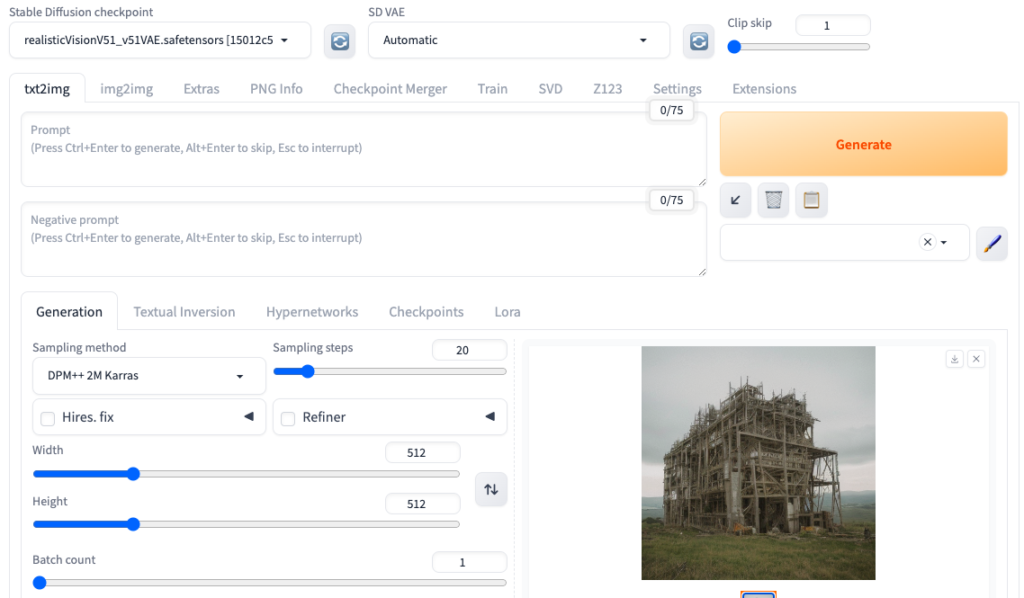
以下の画像のように、見た目は「Stable Diffusion Web UI(AUTOMATIC1111)」と変わっていない感じがありますが、
「Stable Diffusion WebUI Forge」の方では、「Stable Diffusion Web UI(AUTOMATIC1111)」よりも元々備わっている機能が多くあります。
是非記事を参考にして「Stable Diffusion WebUI Forge」を利用してみてください。
この記事では、「Stable Diffusion WebUI Forge」の導入方法について解説します。
ForgeとAUTOMATIC1111の違いについて

ForgeとAUTOMATIC1111の違いですが
Forgeの方が低いVRAMで実行でき、高速で画像生成することができます。
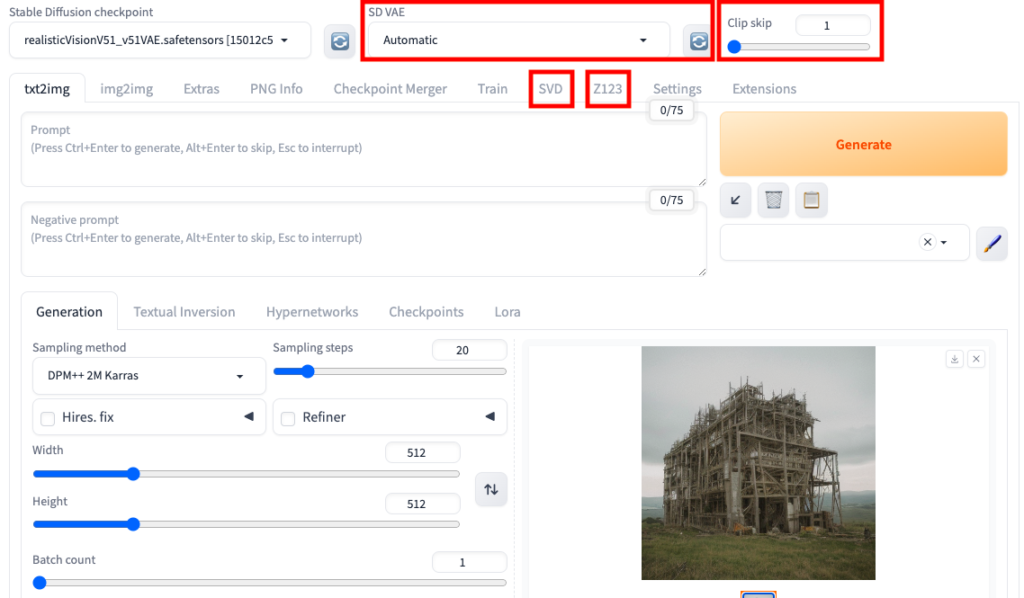
他には、上部に「SD VAE」と「Clip skip」の設定項目が初期から設定されていたり、
「SVD」や「Z123」のタブが追加されているので便利です。
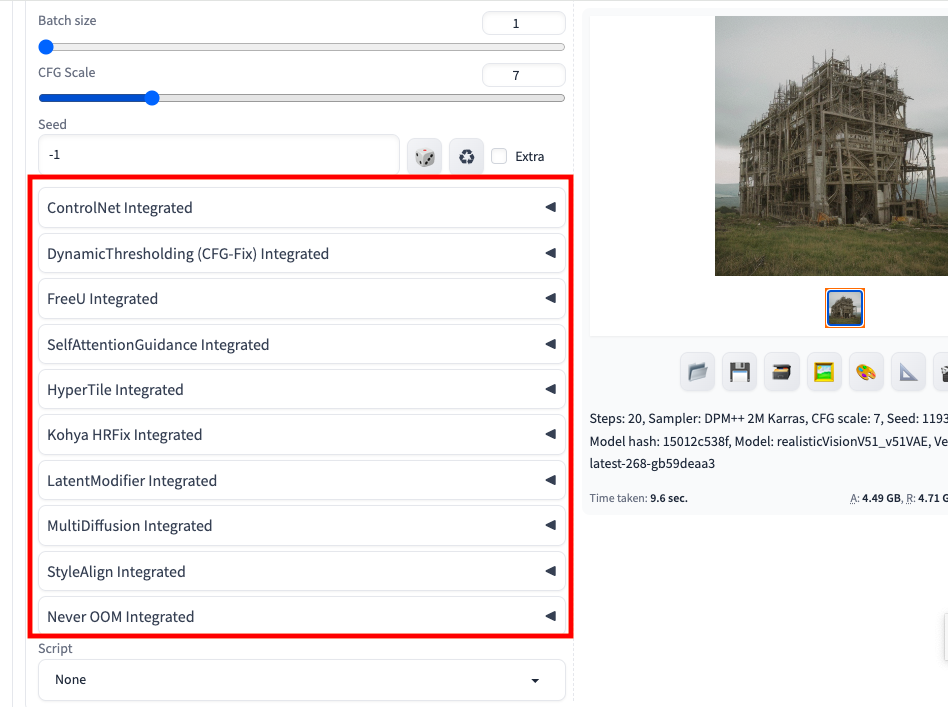
下にスクロールすると、ControlNetなど多くの拡張機能が予め用意されているので
導入する手間を省くことができます。
Stable Diffusion WebUI Forgeのインストール方法

Stable Diffuision WebUI Forgeは以下のGitHubのURLからインストールできます。
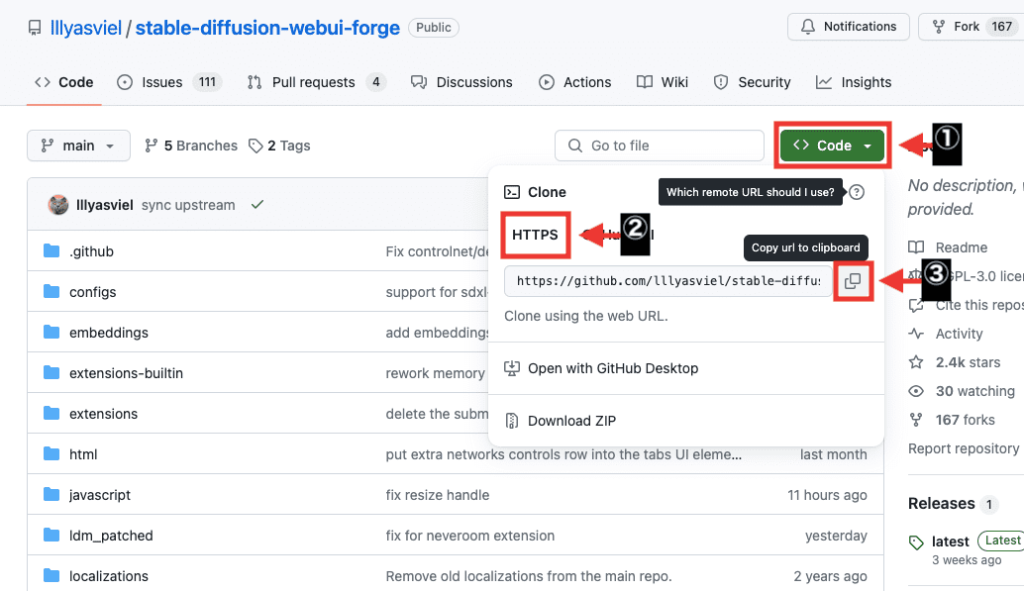
次の方法でインストールURLをコピーできます。
①「Code」をクリックする
②「HTTPS」を選択する
③「コピーアイコン」をクリックする
ローカル環境でStable Diffusion WebUI(AUTOMATIC1111)を使っていた方は
Stable Diffusion WebUIのインストールURLを
Stable Diffusion WebUI ForgeのインストールURLに変更することで
Stable Diffusion WebUI Forgeを使用することができます。
Google Colabの場合

Google Colabを使っている方は、以下のコードをコピペするだけで使用できるので参考にしてください。
!pip install -q torch==2.0.0+cu118 torchvision==0.15.1+cu118 torchaudio==2.0.1+cu118 torchtext==0.15.1 torchdata==0.6.0 --extra-index-url https://download.pytorch.org/whl/cu118 -U

!pip install -q xformers==0.0.19 triton==2.0.0 -U

#stable diffusion webui forgeのダウンロード
!git clone https://github.com/lllyasviel/stable-diffusion-webui-forge
%cd /content/stable-diffusion-webui-forge

#AnyLoRA - Checkpointモデル
!wget https://civitai.com/api/download/models/95489 -O /content/stable-diffusion-webui-forge/models/Stable-diffusion/anylora.safetensors

#vae-ft-mse-840000-ema-pruned
!wget https://huggingface.co/stabilityai/sd-vae-ft-mse-original/resolve/main/vae-ft-mse-840000-ema-pruned.safetensors -O /content/stable-diffusion-webui-forge/models/VAE/vae-ft-mse-840000-ema-pruned.safetensors

#起動
!python launch.py --share --xformers --enable-insecure-extension-access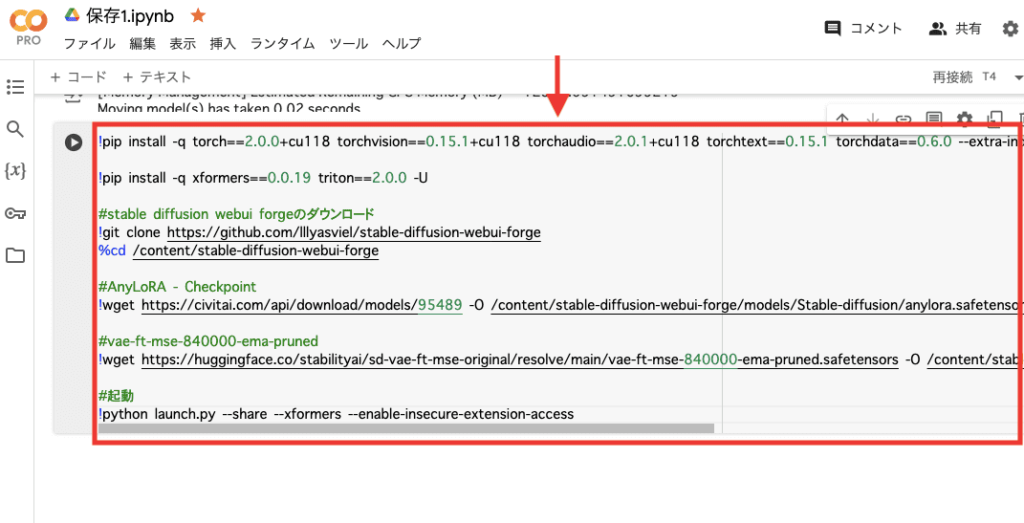
Paperspaceの場合

ここでは、Paperspaceを使っている方のためにStable Diffusion WebUI Forgeの導入方法について解説します。
新規でプロジェクトを作成する
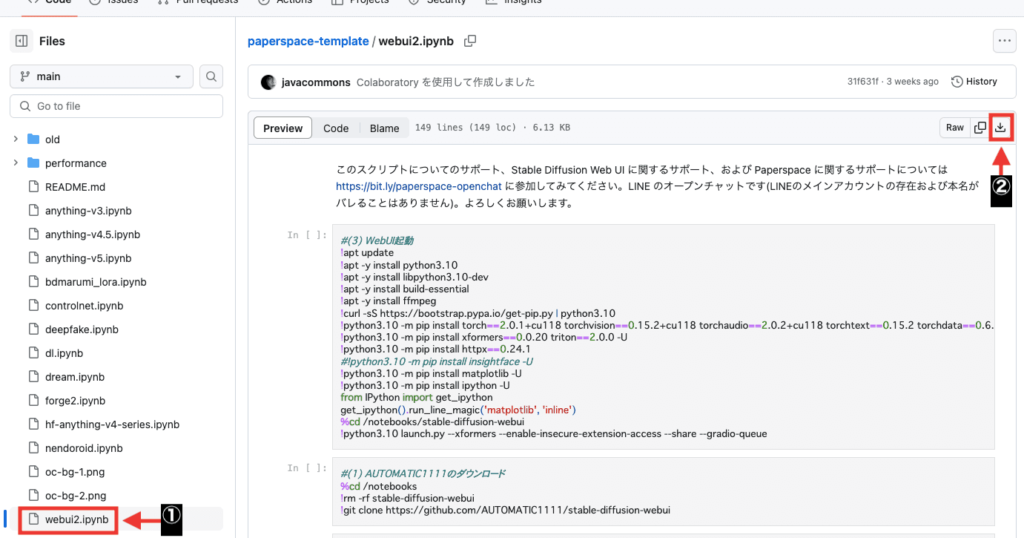
以下のGitHubのリンクにアクセスしてください。
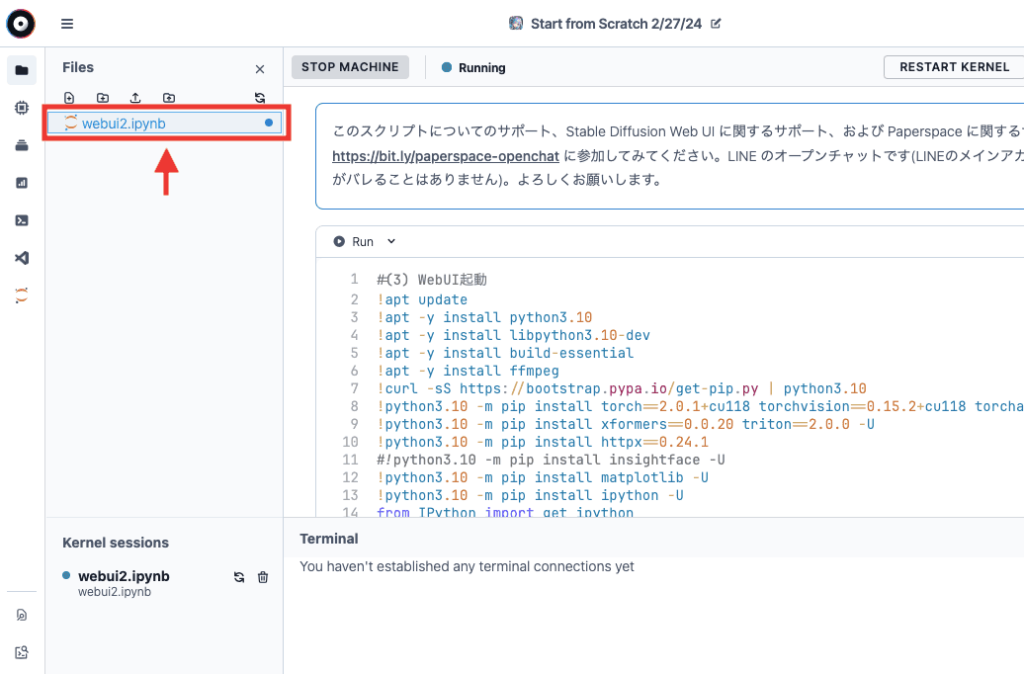
左下にある「webui2.ipynb」をクリックしてから
右上にある「ダウンロードアイコン」をクリックしてファイルをダウンロードしてください。
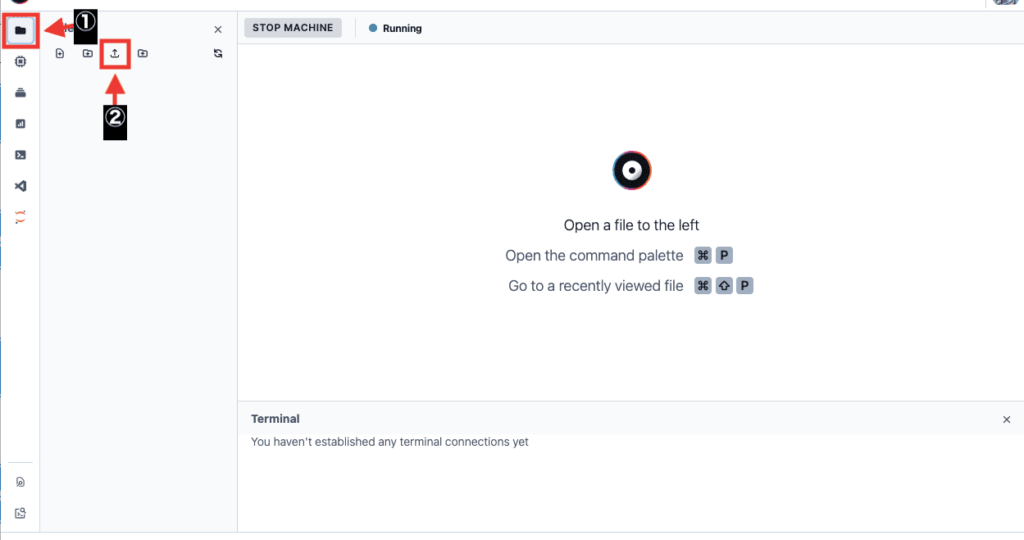
Paperspaceのプロジェクトを新規作成した後に
左側にある「ファイルアイコン」をクリックしてから
「アップロードアイコン」をクリックして先ほどダウンロードしたファイルをアップロードしてください。
「webui2.ipynb」をクリックしてください。
Stable Diffusion WebUI Forgeをダウンロードする
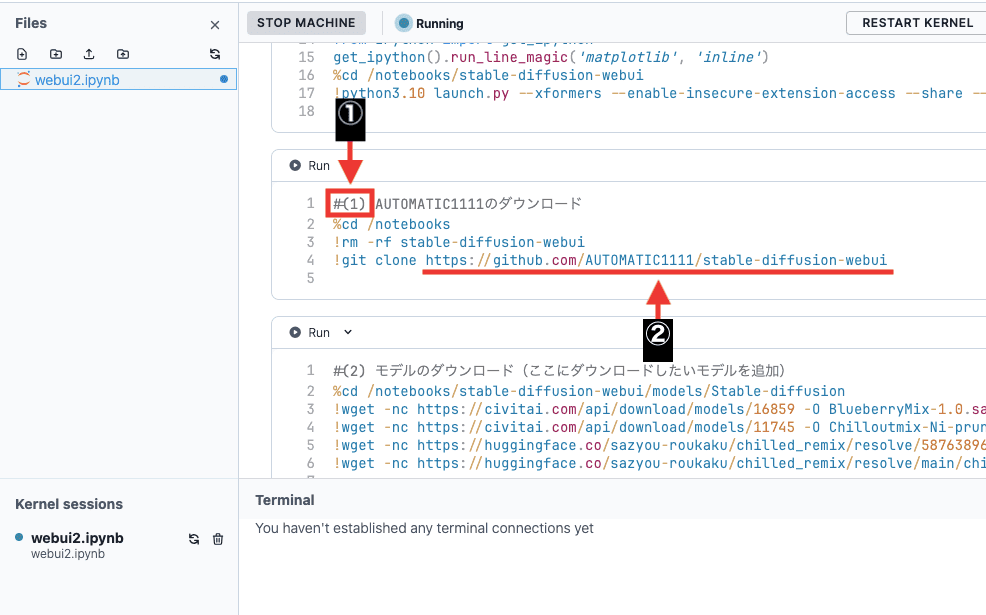
(1)のコード内にある「https://github.com/AUTOMATIC1111/stable-diffusion-webui」ですが、
こちらはStable Diffusion Web UI(AUTOMATIC1111)をダウンロードするURLなので、
Stable Diffuison WebUI ForgeのダウンロードURLに変更します。
以下のGitHubのリンクにアクセスしてください。
「Code」をクリックしてから「HTTPS」を選択して、
表示されているURLの右側にあるコピーアイコンをクリックしてください。
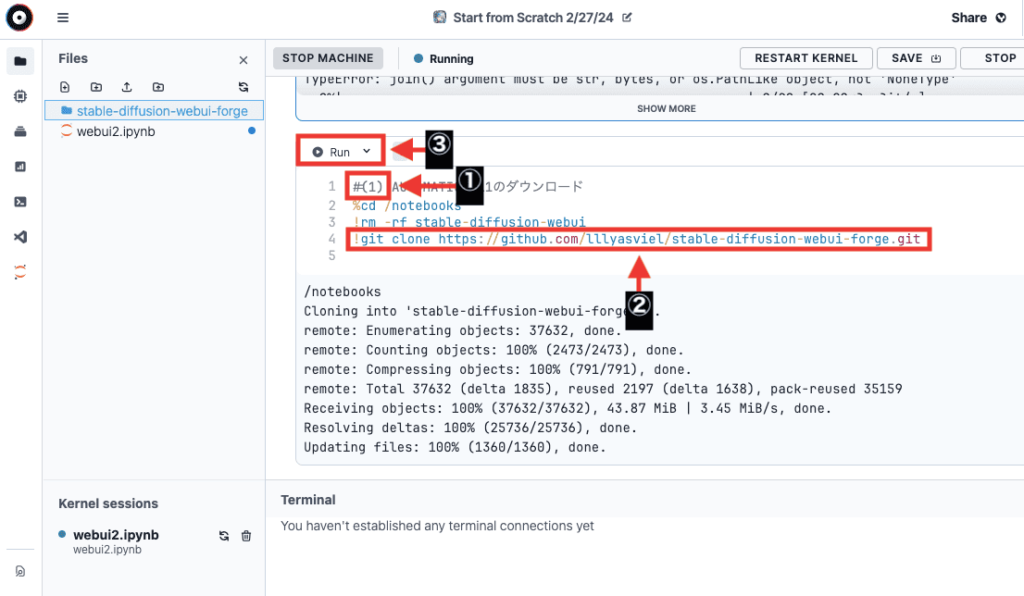
Paperspaceに戻ってから、「!git clone 」の後にコピーしたダウンロードURLをペーストしてください。
ペーストしたら「Run」をクリックすることで、Stable Diffuison WebUI Forgeをダウンロードします。
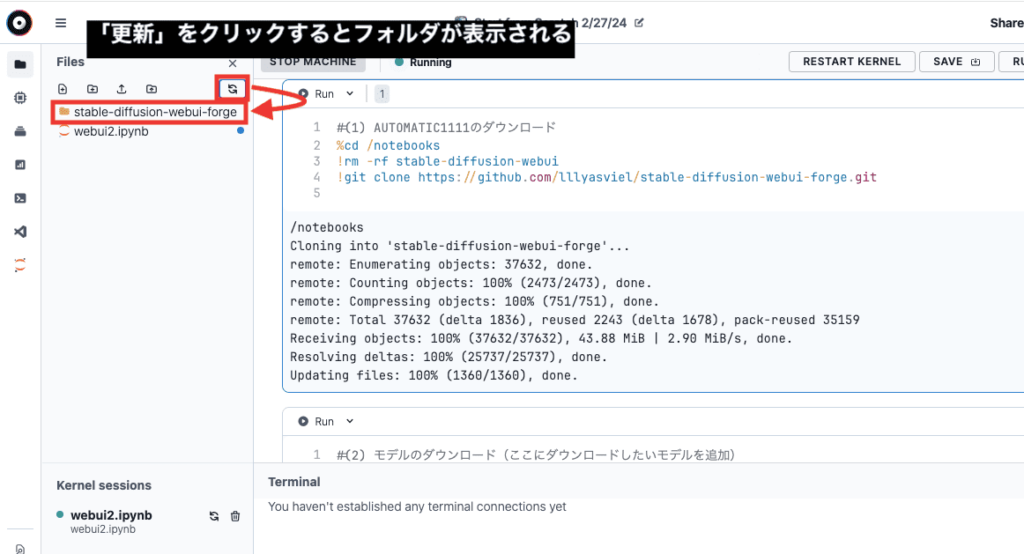
「更新」アイコンをクリックしてダウンロードしたフォルダを表示してください。
モデルをダウンロードする
次は各モデルをダウンロードしていきます。
(2)のコード内にある「stable-diffusion-webui」と記載されている部分を「stable-diffusion-webui-forge」に全て変更してください。
ここを変更しないとモデルをダウンロードすることが出来ません。
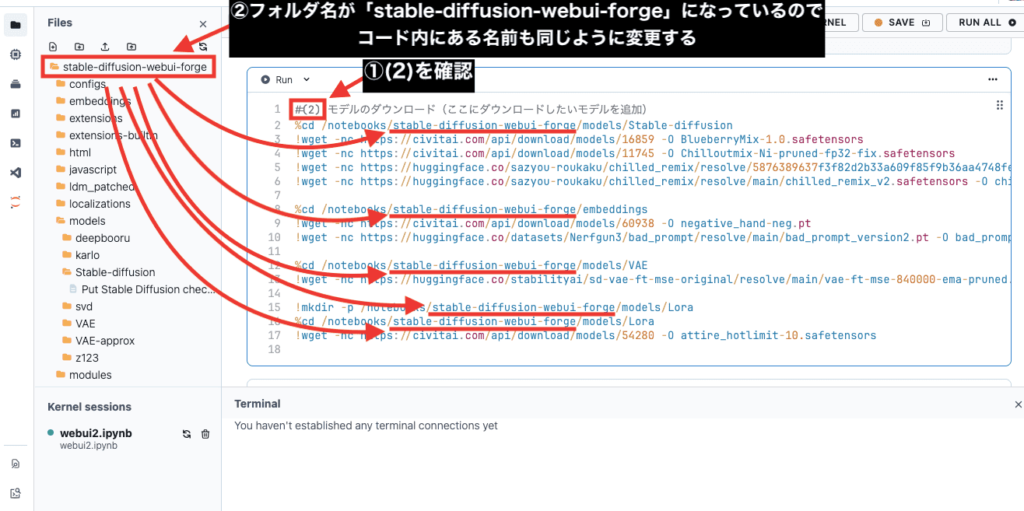
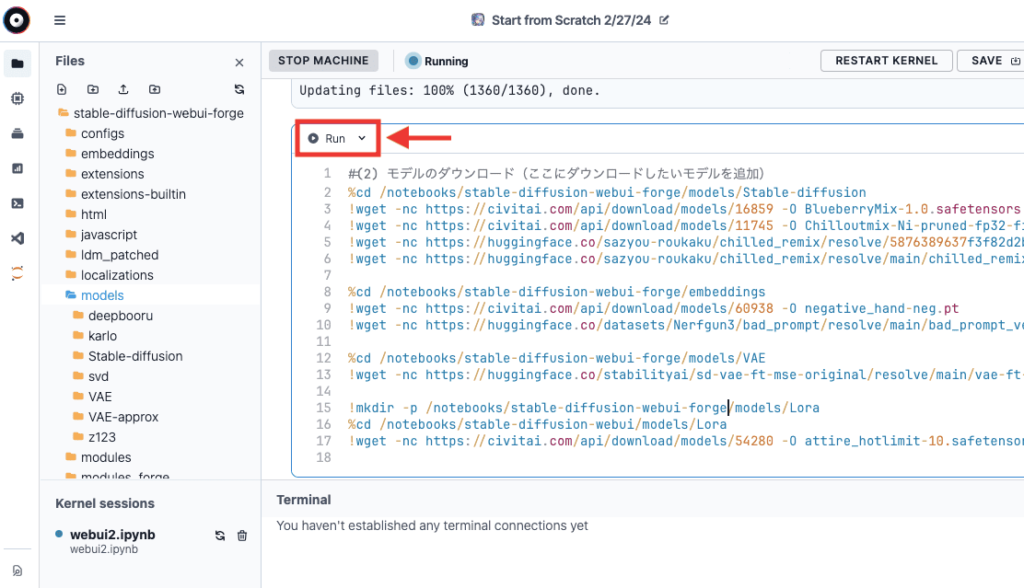
予め用意されているモデルをダウンロードする場合は、そのまま「Run」をクリックしてください。
まずは「Stable Diffuison WebUI Forge」の起動を確認するために、
予めコード内に記載されているモデルをダウンロードして進めることを推奨します。
別のモデルを導入したい場合は、
PaperspaceでStable Diffusion Web UI(AUTOMATIC1111)を使用する時と同じ方法で
モデルのコードを記載すると追加できます。
こちらの記事では、Paperspaceを使って各モデルの追加方法について解説しているので読んでみてください。
Stable Diffusion WebUI Forgeを起動する
(3)のコード内にある「stable-diffusion-webui」と記載されている部分を「stable-diffusion-webui-forge」に変更してから、
上部にある「Run」をクリックしてください。
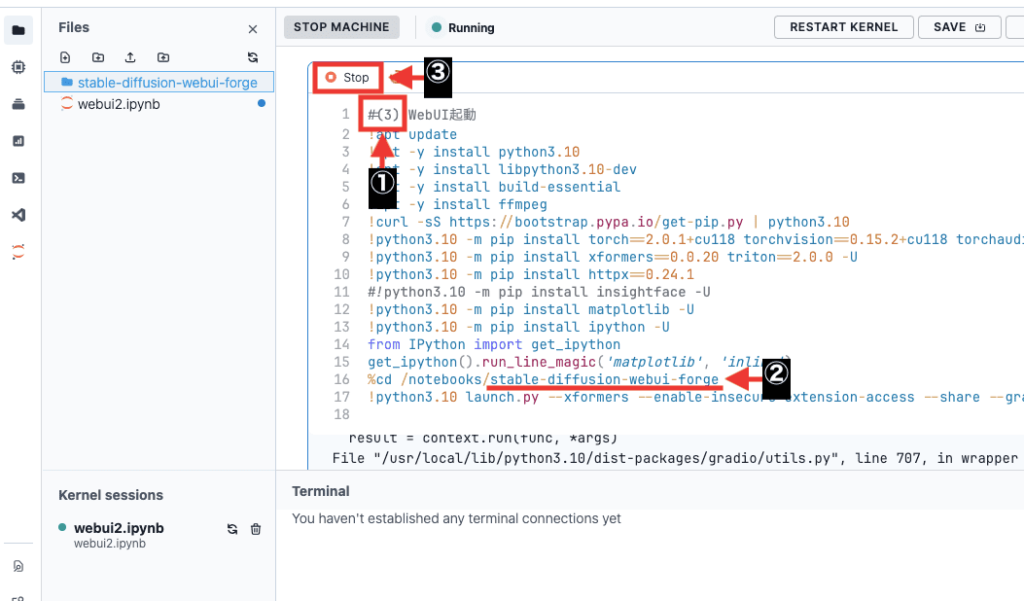
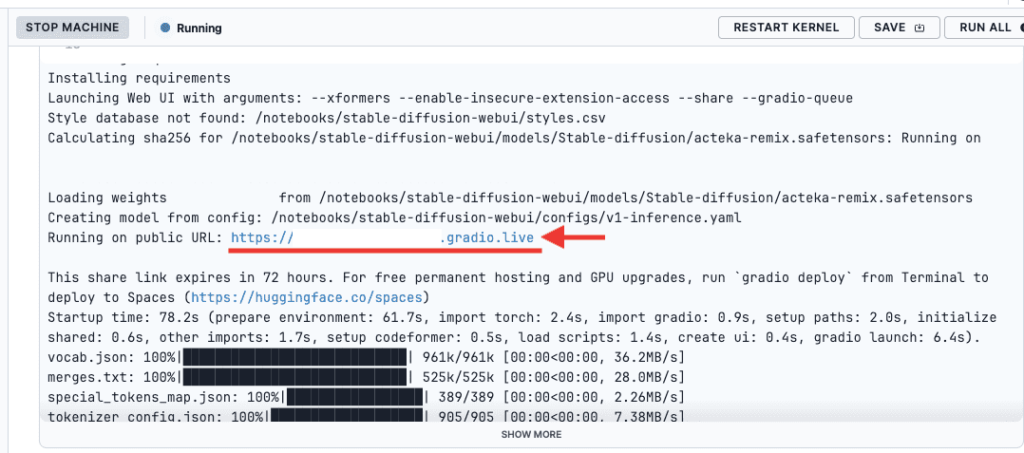
約数十分後くらいに、コードの一番下付近にある「gradio.live」と書かれたURLが表示されているので、
クリックすると「Stable Diffusion WebUI Forge」を起動することが出来ます。
まとめ

Stable Diffusion WebUI Forgeの導入方法について解説しました。
・ForgeはAUTOMATIC1111よりも低いVRAMで実行できて高速に画像生成できる
・便利な機能が初期で設定されている
Stable Diffusion WebUI Forgeは、AUTOMATIC1111のWeb UIと同じように使うことが出来るのでおすすめです!
是非参考にしてStable Diffusion WebUI Forgeを導入してみてください!